
THE PERMACULTURE HOMESTEAD
A Virtual model to show you how it looks and functions
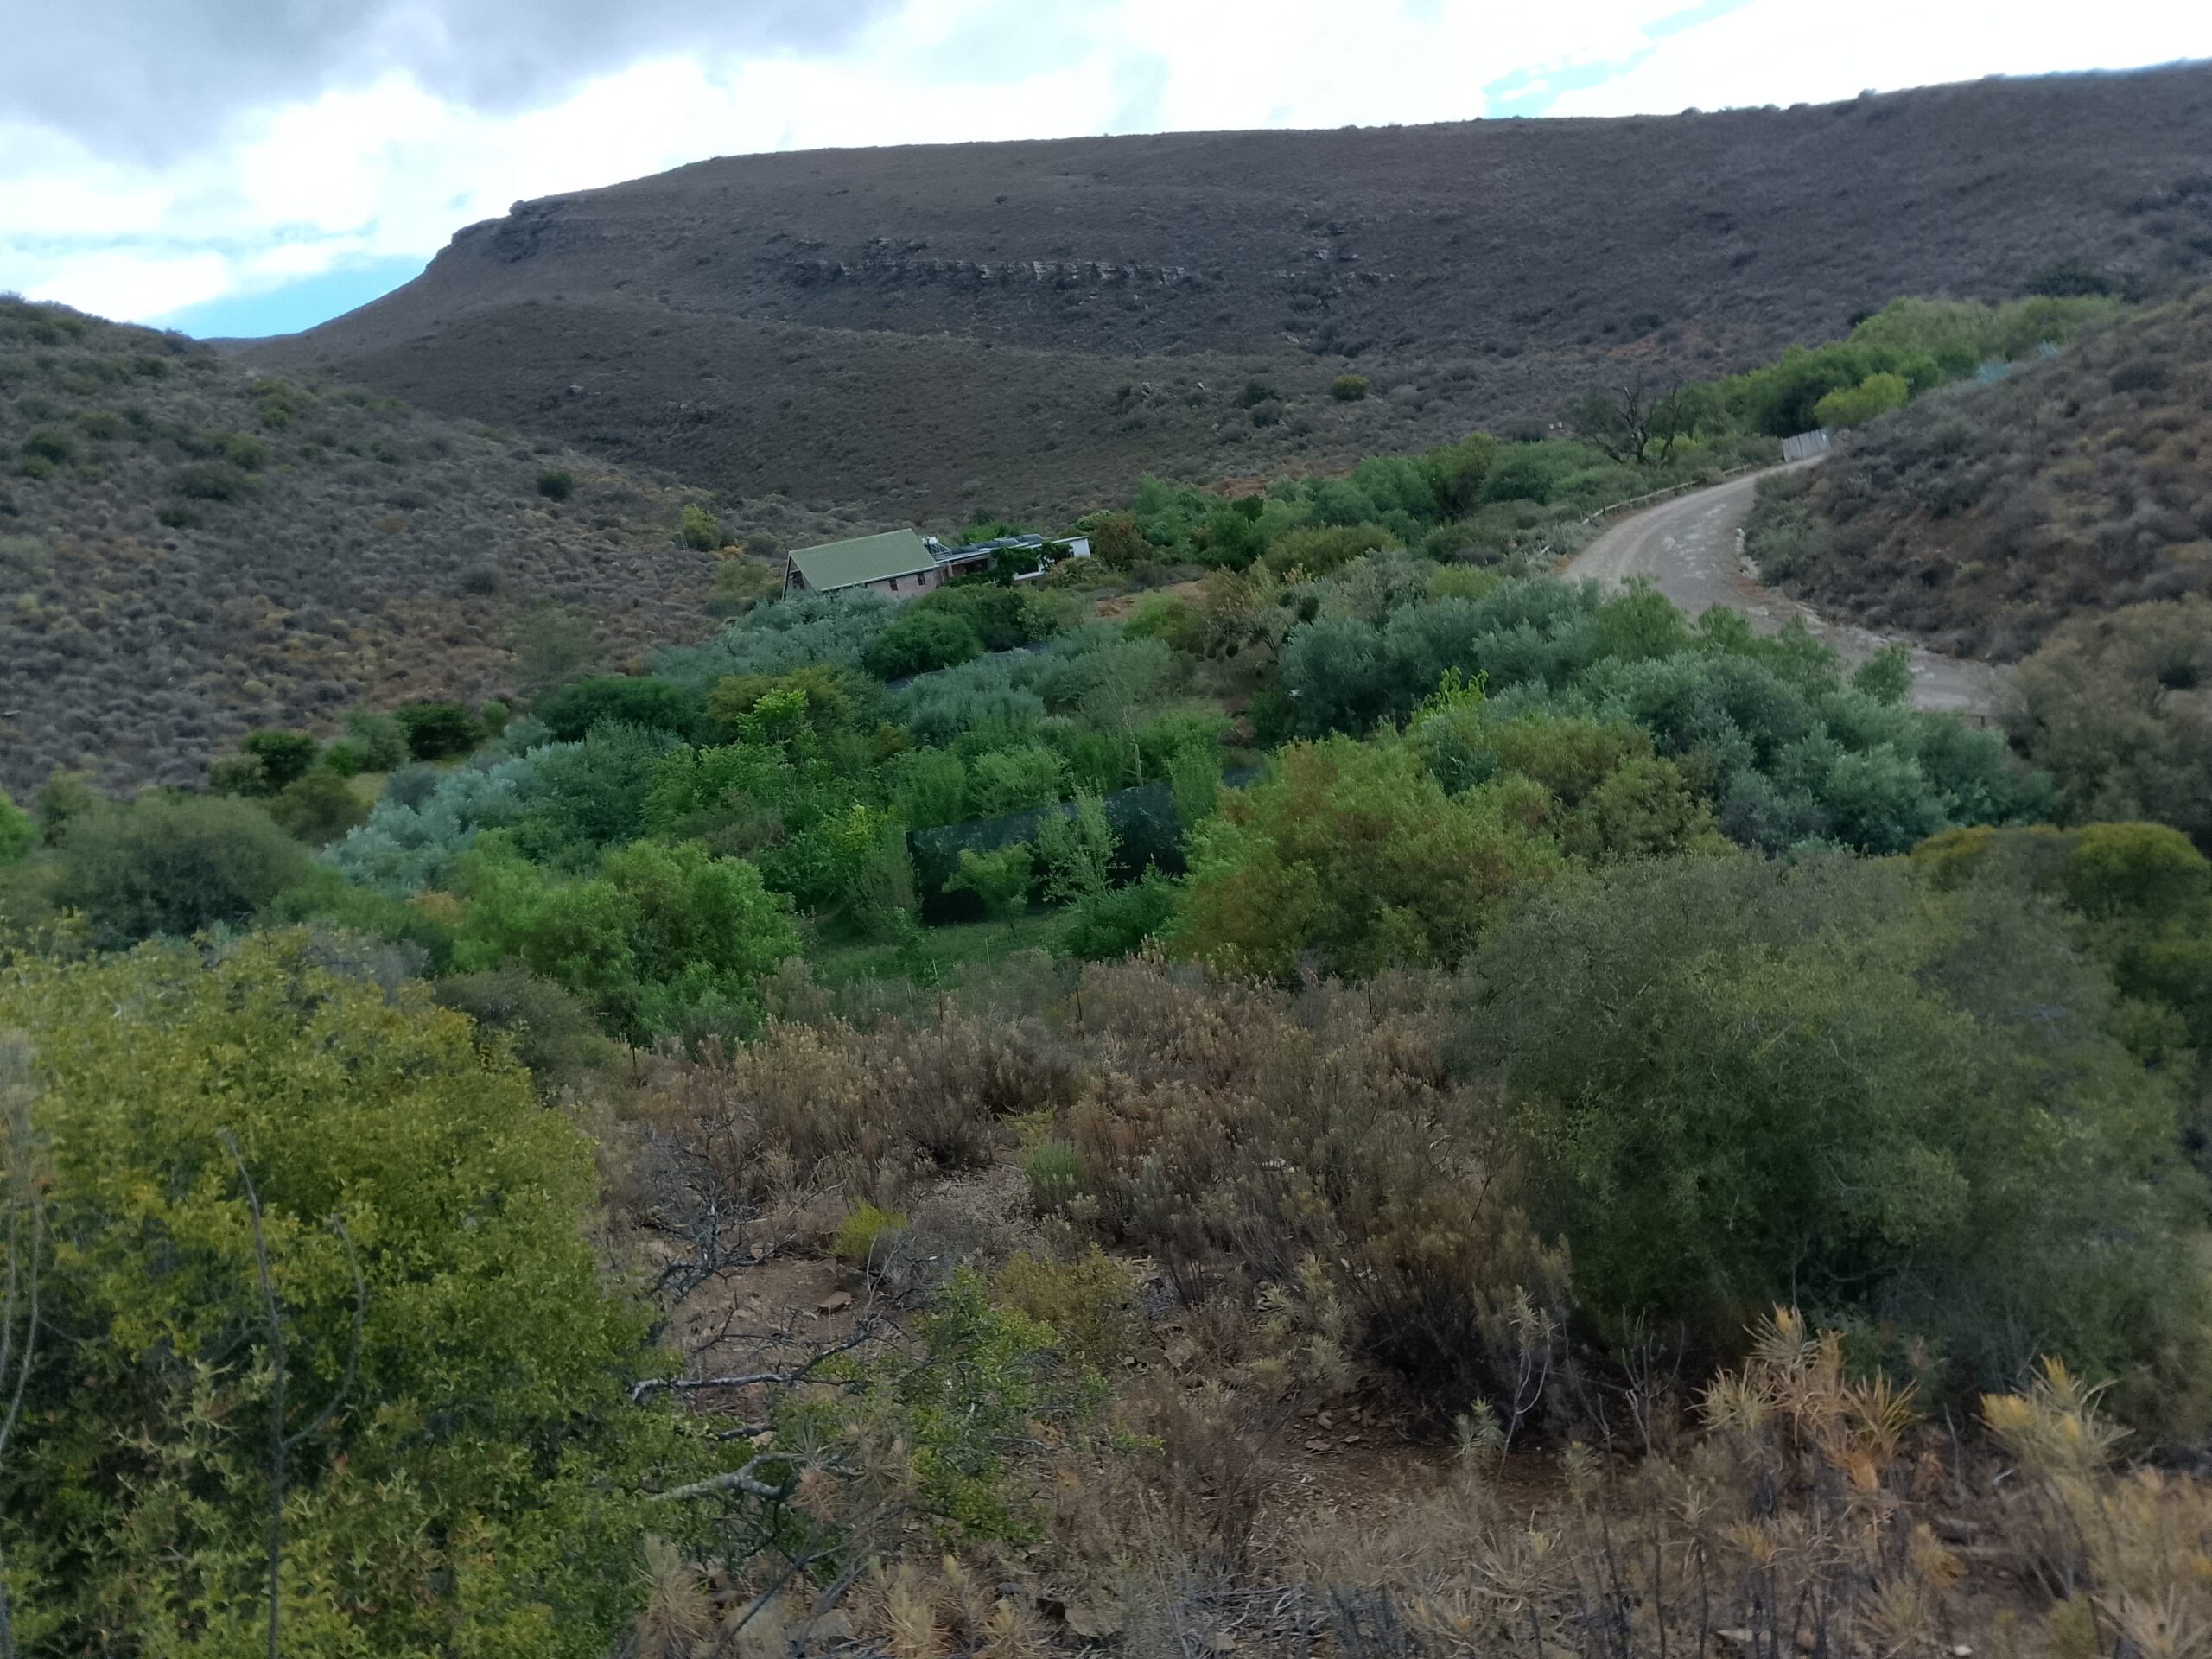
Visualising Your Ideal Permaculture Self-Reliance System
Let’s take a closer look at what a well-balanced, permaculture-designed self-reliance system can look like, one that meets your family’s daily needs and generates a comfortable surplus without turning into a major commercial farm.
Our aim is to give you a clear, realistic vision of a typical permaculture layout based on the Permaculture Zone Model. This kind of system functions as a highly effective regenerative human life-support system. It offers you and your family long-term security and a high quality of life off the grid, while at the same time helping to restore and strengthen the local ecosystem, improving water cycles, building healthy soil, and increasing biodiversity.
Why the Permaculture Zone Model Matters
If you want to truly understand how a permaculture system is designed and how it functions, the best place to start is with the Permaculture Zone Model.
This model is the fundamental spatial pattern in permaculture. It shows us exactly where to locate the different parts of the system and how they should relate to each other in a practical, functional way.
By using the Zone Model, we can plan the layout so that every element is placed in the right relationship to the others. The result is a system that uses energy very efficiently, saving time, reducing unnecessary work, and allowing the whole design to run more smoothly and naturally.
The Permaculture Zone Model

The Concentric Pattern Arrangement
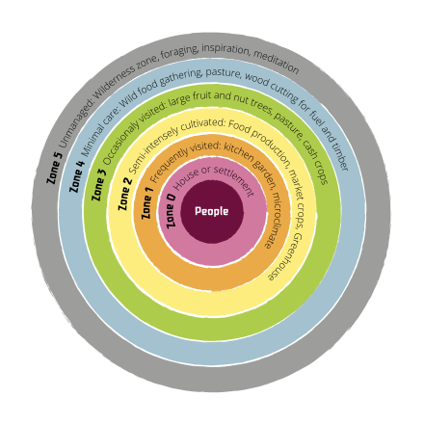
The Permaculture Zone Model uses a concentric (circular) arrangement with the home at the centre. It organises the landscape so that the most intensive land-use systems are placed closest to the house, while less intensive, lower-maintenance systems are positioned further outward.
As you move away from the centre, land-use intensity gradually decreases until it eventually transitions into wilderness (Zone 5).
This pattern is similar to a ripple in a pond: the strongest energy and activity is at the centre, gradually lessening as it moves outward.
Elements and components are placed into specific zones according to the Three Laws of Zoning:
- How frequently you need to use or visit them
- How much attention or service they require
- How much space they need
For example, a vegetable garden needs frequent harvesting, regular maintenance, and relatively little space, so it belongs near the centre. In contrast, a woodlot requires infrequent attention and a large area, so it is placed toward the outer edge.
The concentric model also shows that the further a zone is from the centre, the larger the area it typically covers.
- Zone 0 (the home) and Zone 1 (nearest the home)are at the centre, they have the smallest footprint but the highest energy and management needs per square metre.
- Zone 5 is on the outer edge, it covers the largest area and requires the least service and inputs.
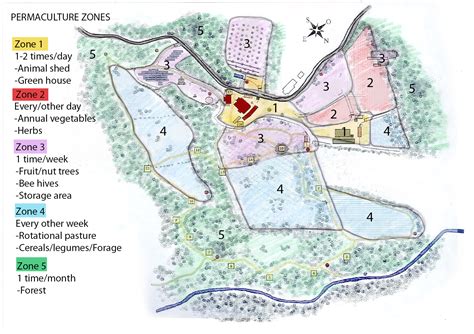
The Zone Model is Flexible
It’s important to remember that the concentric circles in the Zone Model are simply a conceptual teaching tool. In real life, the number of zones and their actual shapes will vary greatly depending on the natural form of your land and what you want to achieve with it.
For instance:
- A small urban garden might only need Zones 0, 1, and 2.
- A remote wilderness retreat could consist almost entirely of Zone 0 and Zone 5.
The Zone Model is meant to be adapted to your unique site and needs — not followed as a strict formula.
Zone by Zone Example of a Classic Permaculture Self-Reliance Model
Let’s take a closer look at the classic 5-Zone Permaculture Model. In the following sections, we will systematically explore each zone , its characteristics, purpose, and the kinds of elements and systems you can expect to find there. This model is one of the most useful tools in permaculture, helping you organise your land logically so that everything works together efficiently and harmoniously.
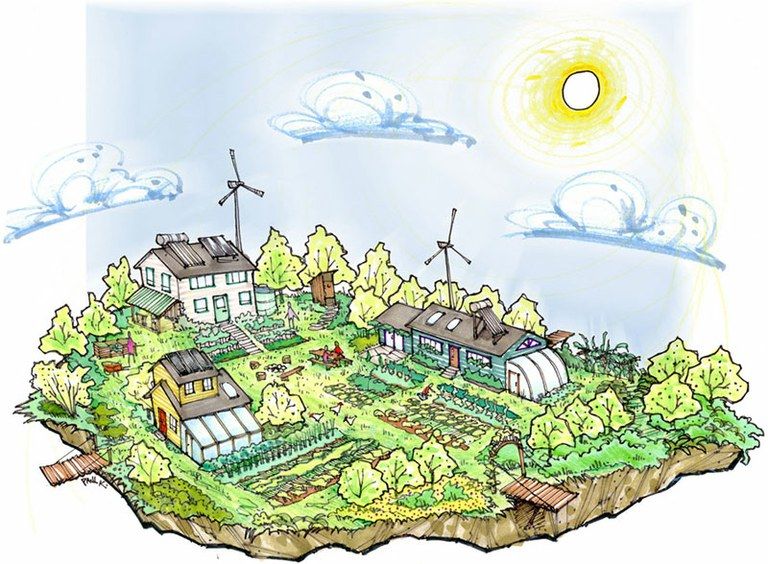
Climate Considerations in Permaculture Design
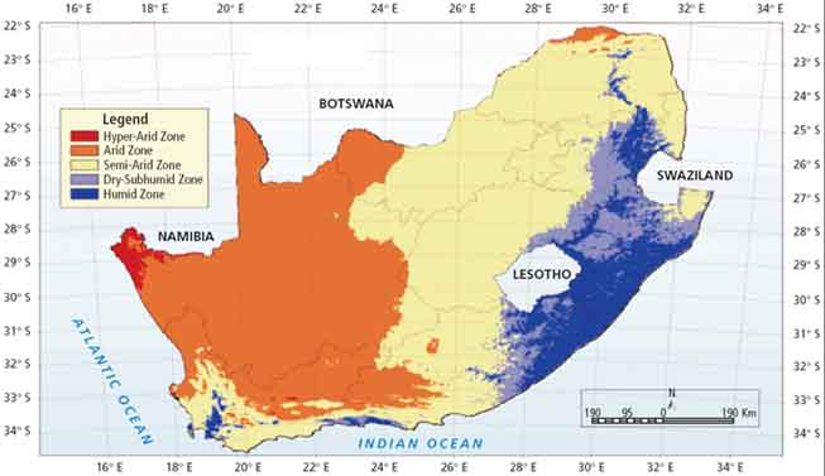
When we apply permaculture design to any context, we follow a consistent set of principles and processes. However, the specific design strategies, choice of components, and plant or animal elements are always determined by climate appropriateness.
It is essential to understand the climate of your site, as it forms the fundamental basis for all design decisions. The design of houses, food gardens, water systems, and agricultural layouts changes significantly depending on whether you are in a tropical, subtropical, temperate, Mediterranean, arid, or semi-arid climate.
Trying to grow tropical species in a cold temperate region or building a house designed for a cold climate in a hot desert is a classic Type 1 Error — a major, avoidable mistake that is difficult to correct later.
The purpose of this section is not to detail specific design strategies for every climate zone, but rather to illustrate the Permaculture Zone Model in a general, generic way, with a few important considerations.
The model presented here assumes some slope on the land, as most properties have at least a gentle incline. The plant species and elements shown are not prescriptive, they are included to demonstrate function and to convey the basic spatial principles of permaculture design.
You will need to do your own research for your specific bio-region to ensure all choices are climate-appropriate. Any specific layout examples on this site will be clearly labelled with their relevant climate zone to avoid confusion.

Things Every Off-Grid Home Needs
A truly self-reliant off-grid home should include the following essential elements:
- Food Security — Reliable, year-round production of fresh, nutritious food through gardens, food forests, and small livestock.
- Own Supply of Clean Water — Independent rainwater harvesting, storage, and filtration systems.
- Energy-Efficient House — Well-designed, passive solar home with excellent insulation and thermal mass.
- Own Source of Electricity and Heating — Solar power, wind, micro-hydro, or biomass systems combined with efficient heating solutions.
- Disaster Resilience — Systems designed to withstand drought, fire, storms, and other local risks.
- DIY Facilities — Workshop space and tools for maintenance, repairs, and building projects.
- Own Supply of Herbal Remedies — A dedicated medicinal herb garden and processing area for natural healthcare.
- Compost Toilet, Composting, and Waste Recycling Systems — Closed-loop systems that turn waste into resources.
- Plant Propagation System — Nursery area or greenhouse for growing seedlings, cuttings, and new plants.
Zone 0 – The Home
Zone 0 is the beating heart of your entire permaculture system. It is the centre of daily life and the most actively used part of your property.
Whether you live in a compact urban space or on a larger piece of land, Zone 0 is always present. The goal is to design it to be as space-efficient and elegant as possible, transforming your home into a productive, harmonious hub that supports self-reliance and works beautifully with the natural systems around it.
This is where we spend the majority of our time, so it forms the core of our personal life-support system. Everything in Zone 0 is managed with care and visited many times each day.In a homesteading setup, Zone 0 consists mainly of the main house and closely related buildings.
Design Considerations for the Main Dwelling
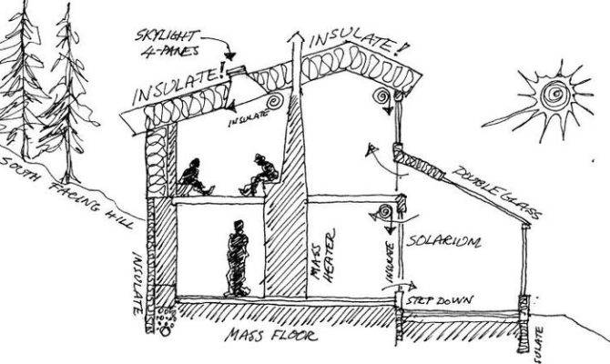
The home should feel alive and form an active part of the regenerative system rather than simply consuming resources. Good design allows the house to:
- Generate useful outputs (rainwater harvesting, greywater for the garden, compost from kitchen waste, and beneficial microclimates established around the house).
- Follow climate-appropriate principles. In a warm temperate region such as the Western Cape, this means excellent passive solar design, good insulation, and natural airflow for energy efficiency.
- Capture maximum sunlight for solar power and water heating.
- Use local and natural materials where possible for construction.
- Respond intelligently to the site’s real opportunities and challenges, including local regulations, topography, and social context.
Ultimately, the house should support a comfortable, beautiful, and high-quality life for everyone living there.

Choosing the Right Location (Very Important)
Avoid building on a ridge just for the view. This is a common and costly Type 1 Error in our region. Ridges are windy, fire-prone, expensive to access, and make water and gardening difficult.
The best position is usually mid-slope, just above the valley where the land starts to flatten (often in the thermal belt). This spot offers:
- Safety from flooding
- Possibility for gravity-fed water
- Good conditions for harvesting runoff and growing gardens
Disaster proofing recommendations
- Install swales above the house to capture and store rainwater while preventing flooding.
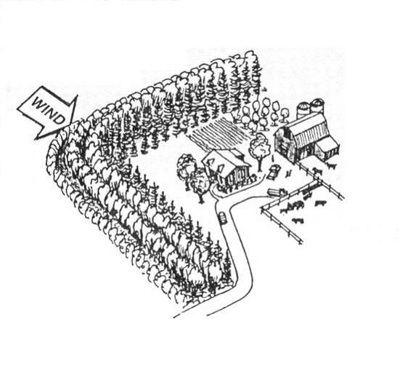
- Plant windbreaks to protect the home and gardens from strong prevailing winds.
- Keep evergreen, well-watered production gardens close to the house as a natural firebreak, avoid thatched rooftops and wooden fascia boards.
Basic Design and Retrofit Strategies for Any Home
Let’s explore some practical, foundational design strategies that can be implemented in almost any context, whether you have a garden or not. These approaches can be retrofitted to most existing dwellings to increase self-reliance and bring the home into better harmony with natural systems.

Materials
Choose natural, local, and low-impact materials that contribute to thermal performance and ecological health.
Cob, mudbrick, strawbale, adobe, and rammed earth are excellent choices for walls. These materials offer high thermal mass, excellent insulation properties, while creating beautiful, breathable, and healthy living spaces.
Rainwater Harvesting
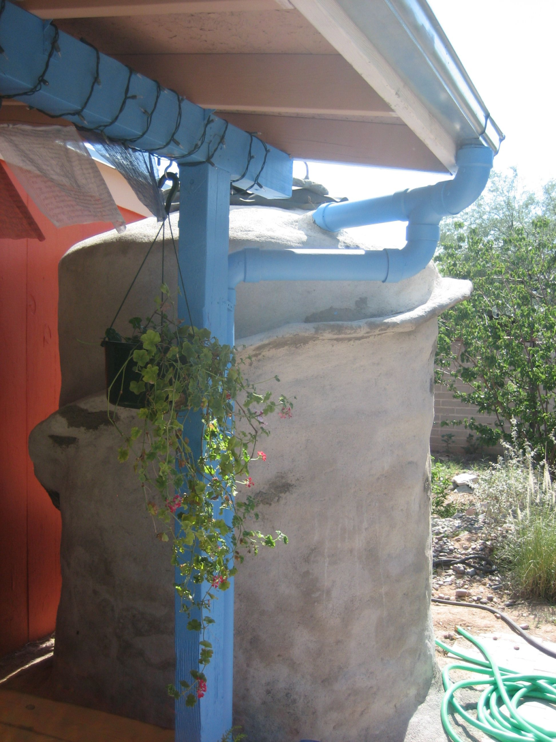
- Buildings serve as the primary rainwater harvesting surfaces in a permaculture system. Rainwater is collected from roofs and directed into storage tanks placed next to or underneath the house for convenient household use.
- Excess water can also be directed into earthworks (such as swales, contour beds, or infiltration basins) in the surrounding gardens, where it slowly infiltrates the soil to recharge groundwater and support plant growth.
Support each Core Function with Multiple Elements
Every essential service, electricity generation, water heating, cooking, and water supply, should have several backup options. For example, a home water heating system might include a solar water heater, a rocket stove water heater, and a gas backup. On cloudy days when solar input is low, wood or gas can seamlessly take over.

Catch and Store Energy
- Install solar panels on the roof. Generate electricity and hot water directly from sunlight.
- Capture and store heat in thermal mass walls and floors. Materials with high thermal mass (such as cob, stone, or rammed earth) absorb heat during the day and release it slowly at night, helping to stabilise indoor temperatures.
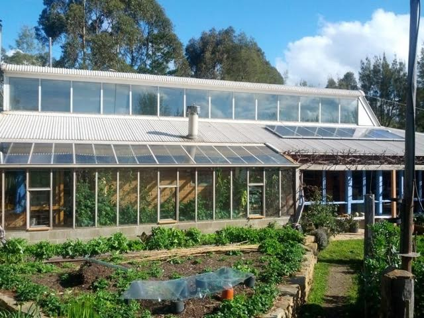
- Attach a glasshouse (sunroom) on the sun-facing side If you live in a coll cool climate. This captures solar gain for passive heating while creating a protected growing space for seedlings and heat-loving plants.
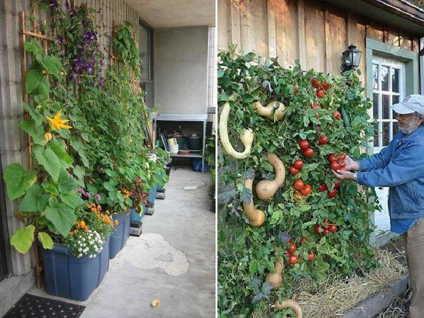
Verticle Space Gardening
Vertical space gardening is a highly effective strategy for small-space homes, urban dwellings, or properties with limited ground area.
By using specially designed vertical structures on sun-facing walls, fences, balconies, or trellises, you can grow a surprising amount of food and herbs. This approach is ideal for climbing plants, vegetables, herbs, and even some small fruits, turning otherwise unused vertical surfaces into productive growing space.

Trellised Vines for Shade
Trellised vines, including grapes and granadillas (passion fruit), are wonderful additions to any home. They can be grown over pergolas on patios or trained directly up the walls of the building, turning vertical space into beautiful and productive growing areas.
Deciduous vines are especially smart because they adapt to the seasons. In summer, they create lovely shade and help keep the house cooler. In winter, they lose their leaves, opening up the space so the sun can naturally warm the building.

Create Closed Loop Systems
Design the home to eliminate waste by turning outputs into valuable resources.
- Recycle all household waste — Separate and process organic, greywater, and solid waste streams.
- Utilise greywater — Redirect water from showers, baths, and sinks into the garden via a safe, filtered greywater system.
- Install a compost toilet or biogas digester – Convert human waste into nutrient-rich compost or biogas for cooking and heating.
- Repurpose materials — Actively recycle and reuse building materials, containers, and other items within the system.
- Create closed-loop cycles — Link the house and garden so that kitchen scraps become compost and the garden feeds the household.
- Use recycled building materials — Incorporate salvaged timber, stone, bricks, and other materials wherever safe and appropriate.

Container Gardening
Even if you only have a patio, balcony, window sill, or bare walls, you can still grow a surprising amount of food using container gardening.
Containers allow you to transform hard, unproductive spaces into thriving mini-gardens. They are also a wonderful opportunity to repurpose old pots, buckets, tins, and other vessels to grow herbs, vegetables, berries, and even compact fruit trees.
Zone 0 Design Services
Zone 0 Design Services
We’d love to help you design a beautiful, regenerative home that harvests its own resources and produces energy, water, and food, while remaining comfortably off-grid.
Having lived off the grid since 1995, Tahir brings real-world experience to every project. Whether you want to retrofit your current home or build a new one, We’ll help you design a space that supports a high quality of life and is perfectly tailored to your lifestyle and needs.
Zone 0 services include:
- Water harvesting and storage systems to make your home self-reliant in domestic water (it’s often easier than you think)
- Greywater recycling and compost toilet systems
- Retrofitting for better natural lighting
- Vertical gardening and container food production
- Passive solar design to capture warmth in winter and stay cool in summer
- Climate-appropriate design for new builds
- Sensibly sized off-grid solar systems combined with energy-efficient appliances and habits (many systems are unnecessarily large and expensive, I focus on smart efficiency first)
Zones 1 to 5 – The Productive Landscape
Once we move beyond the immediate home area (Zone 0), permaculture design centres on creating cultivated plant ecosystems. These systems behave like natural ecosystems but are intentionally designed to produce food, medicine, fuel, and other resources for human needs.
At the heart of these zones are plant-based systems. Plants sit at the base of the trophic pyramid, they are the only living elements capable of turning sunlight into usable energy and biomass through photosynthesis.
A key principle in wise permaculture design is to maximise permanent, living plant cover across the land. By keeping the soil covered and photosynthesising year-round, we can dramatically increase the productivity and resilience of the entire property. Even when animals are part of the system, they ultimately depend on a healthy, productive plant ecosystem to thrive sustainably.
Contour Planting
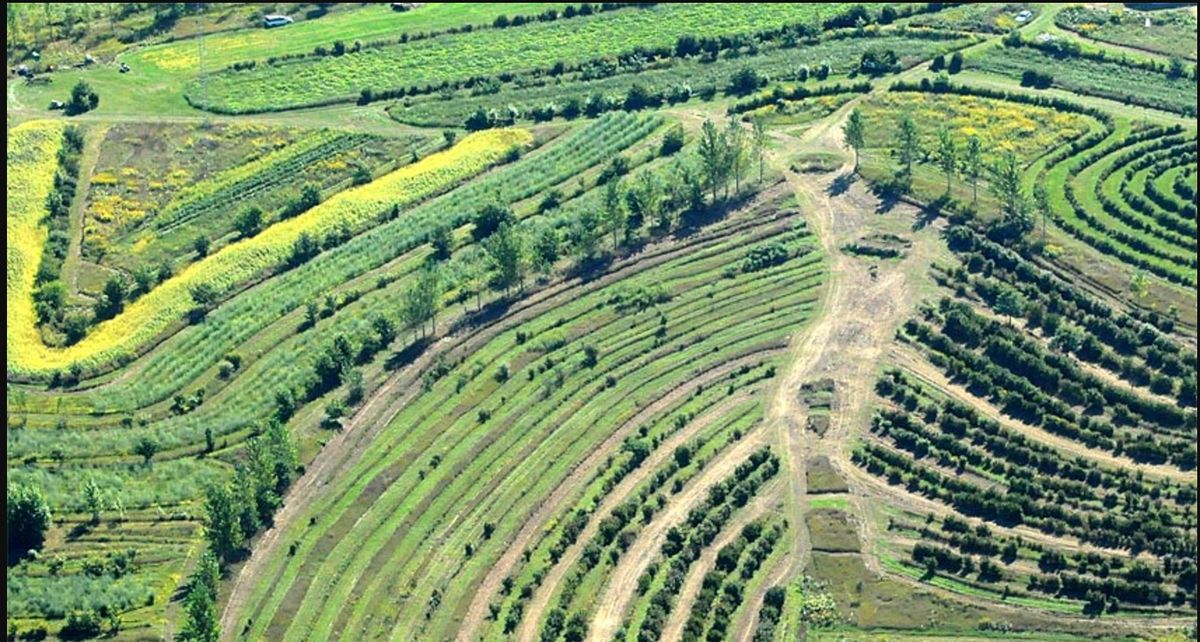
In permaculture, whenever a site has any slope, all gardens and planting systems are established on contour.
Contour planting works in harmony with the natural shape of the land. It slows, spreads, and sinks water, turning a potentially draining landscape into a highly effective water-harvesting system. Whether you are creating vegetable beds or large-scale agroforestry systems, plants are integrated into contour-based earthworks such as swales and Keyline patterns.
This approach creates an elegant, flowing pattern across the landscape that enhances its natural form, builds groundwater reserves, and significantly reduces the need for irrigation.
As we move through each zone, the pattern of planting changes, from vegetables in the inner zones to trees and larger systems further out, and so do the supporting water-harvesting earthworks. These earthworks will be noted for each zone as we progress.
On Flat Land
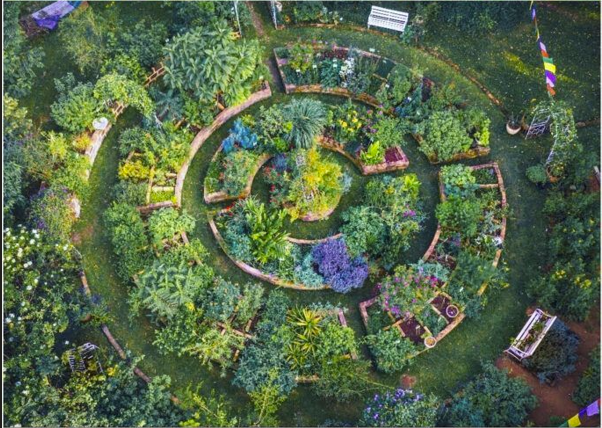
If your property is relatively flat, row planting or circular/spiral patterns (such as mandalas) work best. These patterns effectively hold and spread water while making the most efficient use of space and creating visual and energetic balance in the landscape.

Plant Guilds
A plant guild is a harmonious community of different plants grown together around a central species. Each supporting plant is chosen because it helps the main plant thrive, by improving its health, making our work easier, or protecting it from pests, wind, or extreme weather.
Unlike a monoculture (growing just one type of plant), a guild creates a diverse, interconnected polyculture where every plant plays a supportive role.
The Beauty of Guilds
When you learn to use the multiple functions of each element, you can get far more benefit from your land without needing more space or doing twice the work.
Permaculture gardens rely heavily on polyculture patterns. These are planted in layered, supportive ecosystems and are always tailored to your local climate and conditions.
Main Functions of a Polyculture Guild
Natural pest control
Nitrogen fixing and soil building
Vertical stacking for higher yields
Easier harvesting and maintenance
Better use of vertical space
Greater diversity and resilience
More consistent food production throughout the year
Enhanced beauty and enjoyment
Stronger ecological connections between all elements
Zone 1 The most intensive Zone
The Intensive Garden Zone
Zone 1 is the smallest and most intensively utilised production zone in the permaculture system. It is where we spend the majority of our outdoor time. This zone is compact, highly productive, and receives daily attention. In urban and suburban settings, Zone 1 often makes up the majority of a standard garden. It represents what is realistically achievable in a small urban context. Here you will find social spaces, intensive annual food production, and all the elements and systems that require the most frequent care and regular harvesting.
In Zone 1 you will find social spaces, intensive annual food production, and all the elements and systems that require the most frequent care and regular harvesting. This zone is designed for daily interaction and high productivity, making it the most actively managed area of your permaculture system.

Outdoor Social Spaces
Zone 1 should include attractive, multifunctional outdoor spaces where you can gather with family and friends, relax, socialise, enjoy meals, and even host training or workshops.
These areas serve as a beautiful edge between the house and the garden. They create a smooth, enjoyable transition that gently blurs the line between Zone 0 and Zone 1, making outdoor living feel natural and inviting.
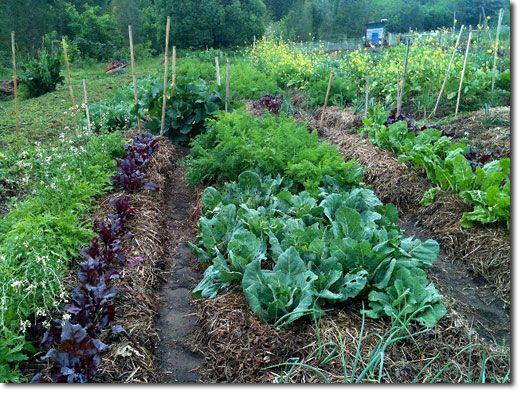
The Vegetable Garden
The vegetable garden is the main source of fresh vegetables for the household.
It focuses on smaller, fast-growing crops that are harvested regularly rather than all at once. These typically include fruiting vegetables (such as tomatoes, peppers, and cucumbers), root crops (carrots, radishes, beets), climbing plants (beans, peas), leafy greens (lettuce, spinach, kale), and heading vegetables (cabbage, broccoli, cauliflower).
Because these crops are picked continuously in small quantities, the garden is designed for frequent access and intensive management.
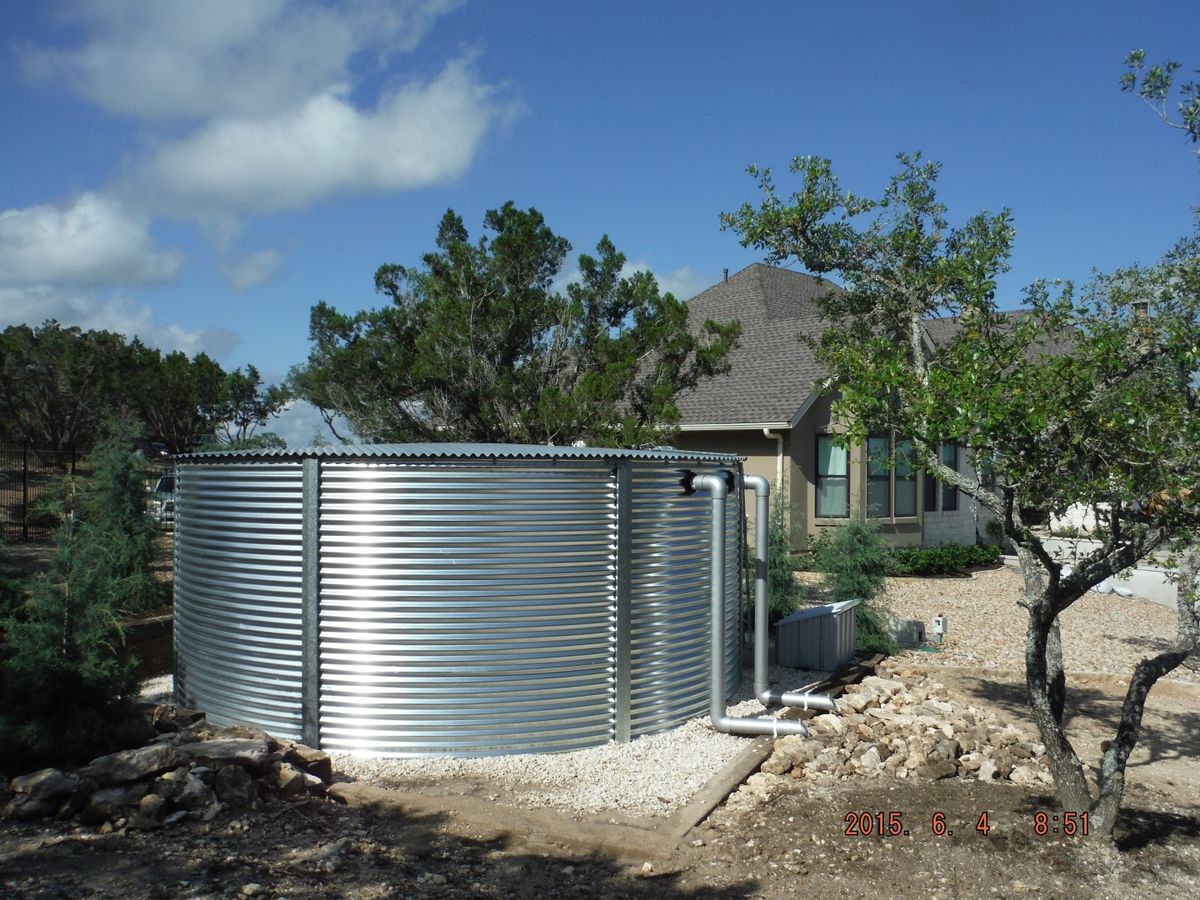
Domestic Water self-reliance
One of the foundations of off-grid living is securing your own clean water supply.
Rainwater is harvested from all roof surfaces and stored in Zone 1 using large volume tanks, plastic, corrugated iron, ferrocement, or even converted swimming pools.
This water can be pressurised and fed directly into the house system, offering a fresh, healthy alternative to municipal water. In areas with good rainfall, tanks refill regularly, so you don’t need massive storage.
Any surplus can be gently directed into earthworks (like swales) in the surrounding garden. This irrigates productive trees and slowly builds a healthy local groundwater table beneath your property.

DIY Workshop
Every self-reliant system needs a practical workspace.
The DIY workshop, located near Zone 0, is where the real hands-on work happens. It is the go-to place for building, repairing, and maintaining all the hard infrastructure on the property, tools, fences, earthworks, and garden structures.
Because it is used almost daily, the workshop is conveniently placed for easy access from the house.
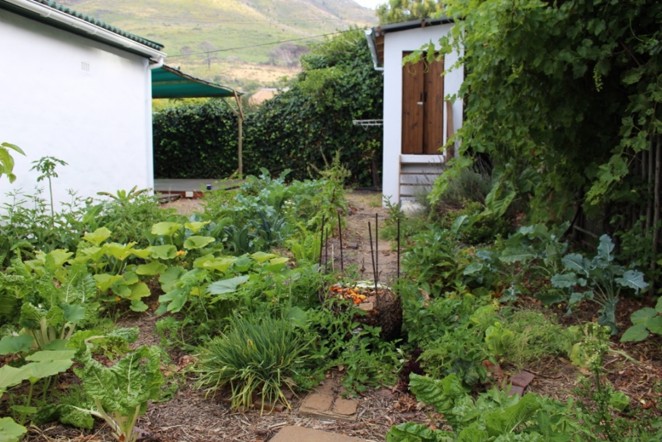
Compost Toilet
The compost toilet is often installed as a stand-alone structure in Zone 1, positioned close to the house.
This placement is practical and respects common cultural practices. Many people feel more comfortable keeping toilet facilities separate from the main living areas of the home. At the same time, locating it in Zone 1 ensures it remains convenient for both household members and anyone working or spending time outdoors on the property.
Benefits of a Compost Toilet
A well-designed compost toilet is one of the most valuable elements in a regenerative, self-reliant home. Instead of flushing waste away with large amounts of clean water, it transforms human waste into a safe, nutrient-rich resource.
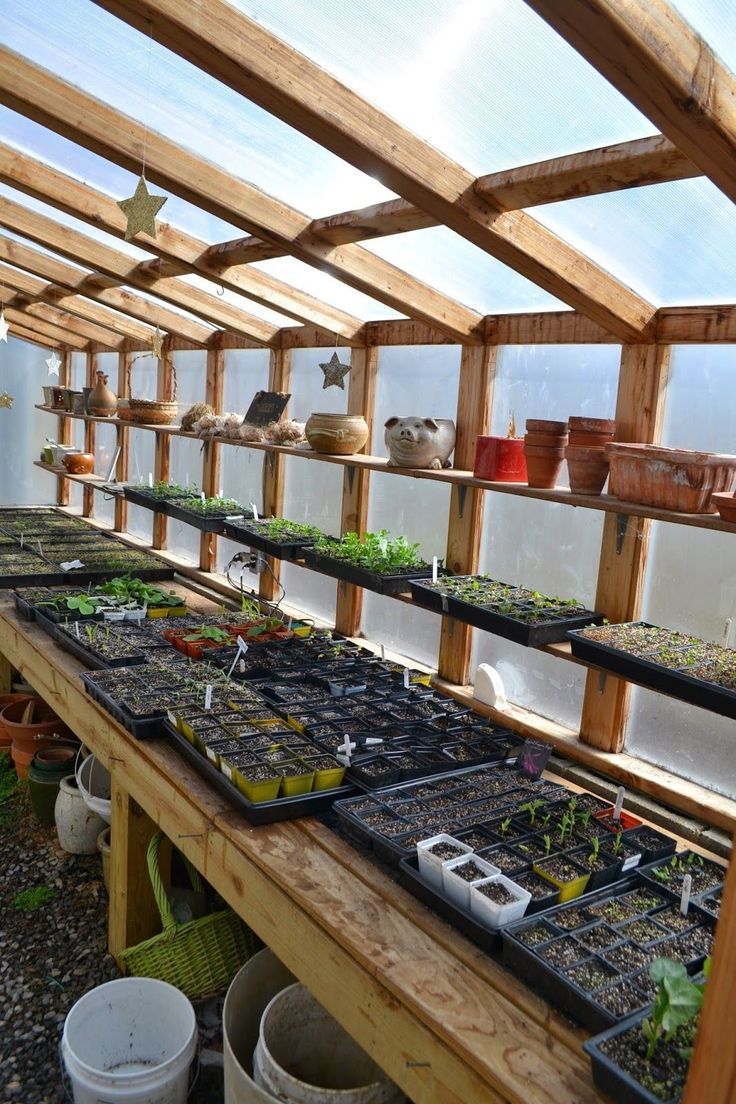
The Plant Propigation Nursery
A healthy, regenerative system must be able to renew and reproduce itself.
That’s why a small, well-tended nursery is placed in Zone 1. Here we grow seedlings, take cuttings, and gently harden off young plants before transplanting them into the gardens. Because this work needs regular daily attention (watering, protection from extremes, and close observation), the nursery is conveniently located close to the house.
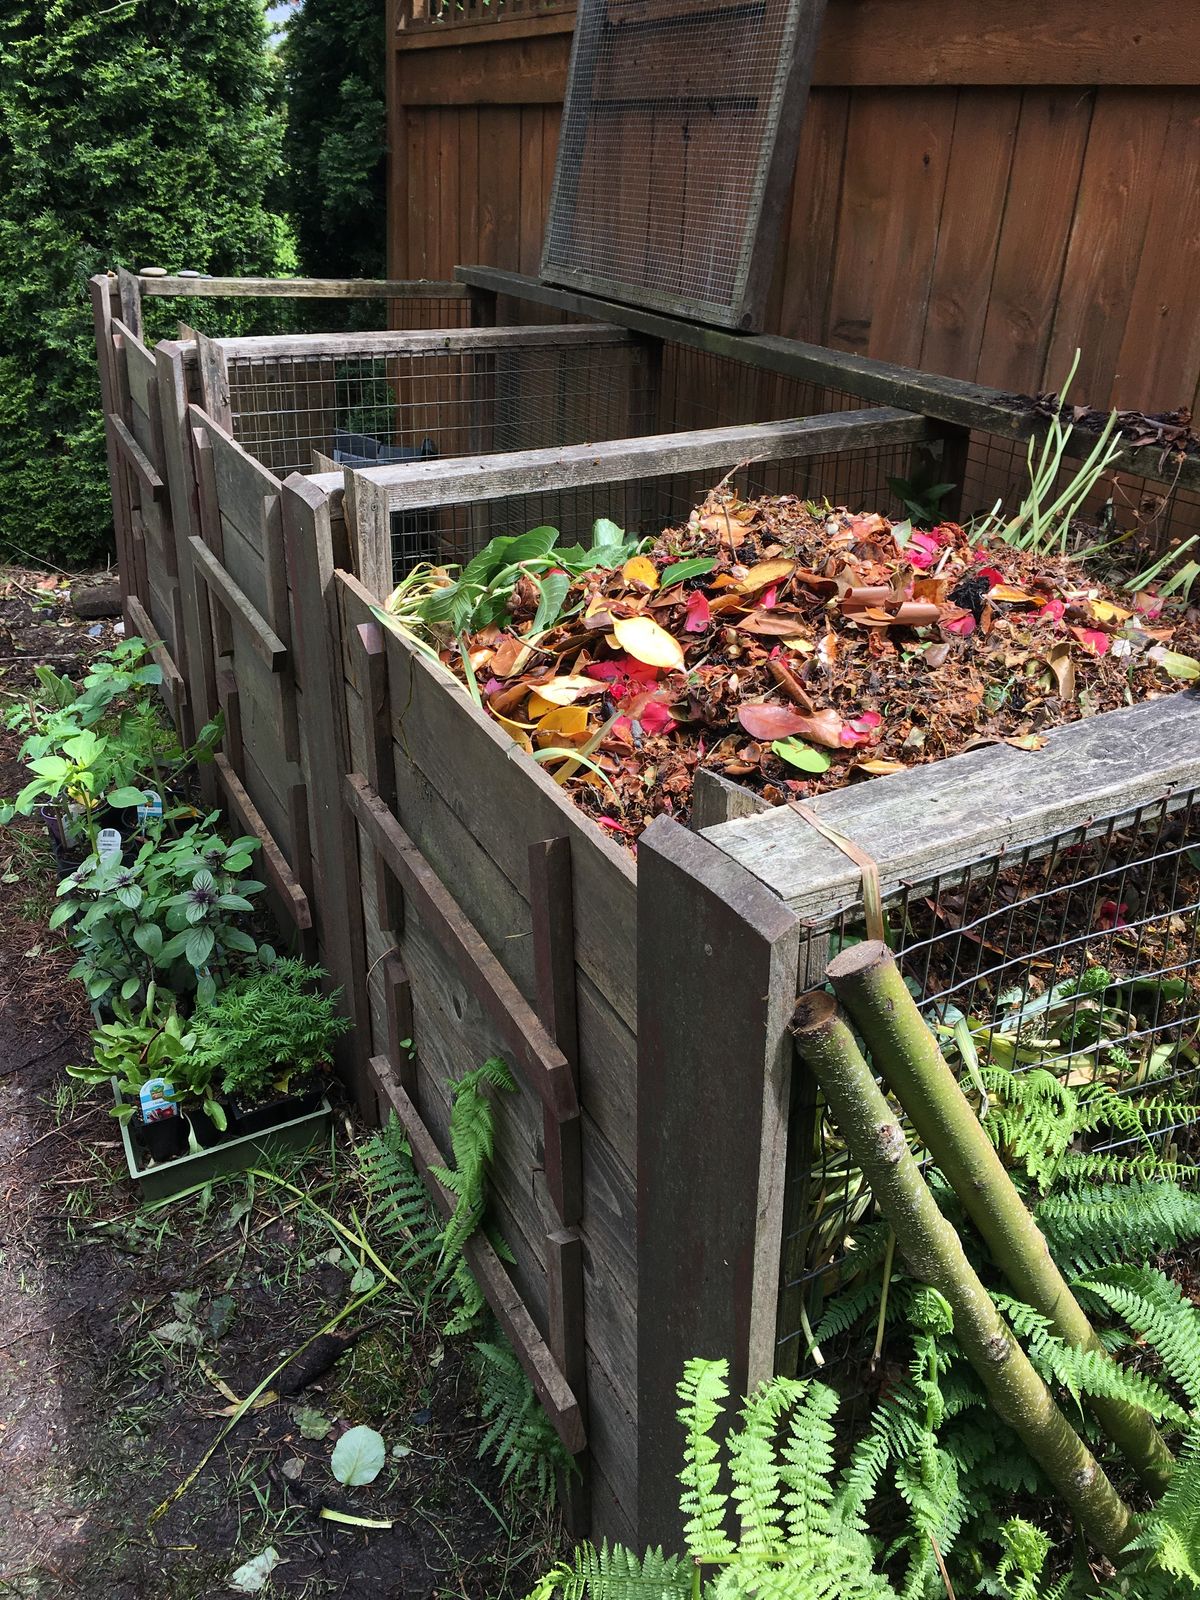
Composting
Zone 1 production systems require a steady supply of high-quality compost to maintain soil fertility and productivity.
Compost can be produced through several effective methods, including:
- Aerobic compost heaps
- Worm farms (vermicompost)
- Fermenting systems (such as bokashi)
- Compost toilets (humanure systems)
Compost systems are typically located close to the gardens where the compost will be used. This proximity makes daily management convenient and reduces the effort of transporting materials.
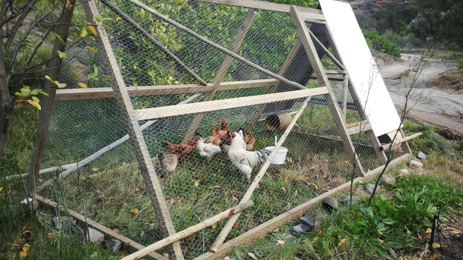
Small Animal Systems
Ecosystemic production and animals go hand in hand. Animals play a critical role in building healthy soils, managing pests and diseases, and providing highly effective, integrated production.
Poultry Systems are particularly well-suited to Zone 1. They can be implemented in several practical ways, including:
- Rotational yards
- Chicken tractors (mobile pens)
- Bee Hives
- Free-ranging systems (with appropriate protection and management)
These systems allow poultry to contribute to soil fertility, pest control, and weed management while producing eggs and meat for the household.
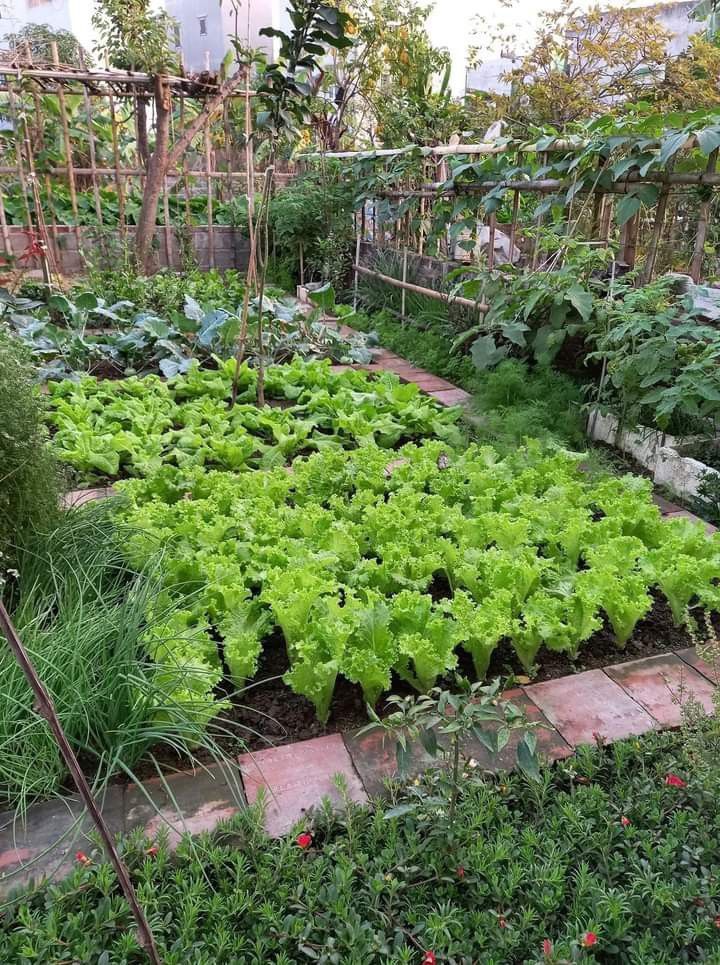
Kitchen Garden
The Kitchen garden is located right on the kitchen doorstep, literally only a few steps away from where meals are prepared.
This garden focuses on fast-growing annuals and perennial herbs that are used almost daily in cooking. It typically contains high-value, fine-textured plants such as salad greens, culinary herbs, chillies, edible flowers, and small fruit crops (like bush tomatoes, strawberries, or peppers).
Because it is harvested frequently and in small quantities, they are kept small, intensively managed, and highly productive.

Container Gardens
In smaller urban or courtyard spaces, container gardens often become the main part of Zone 1.
They are one of the smartest ways to turn otherwise unproductive hard surfaces, such as patios, driveways, pathways, and walls, into thriving, productive growing areas. Containers are flexible, easy to manage, and perfect for making the most of limited space.
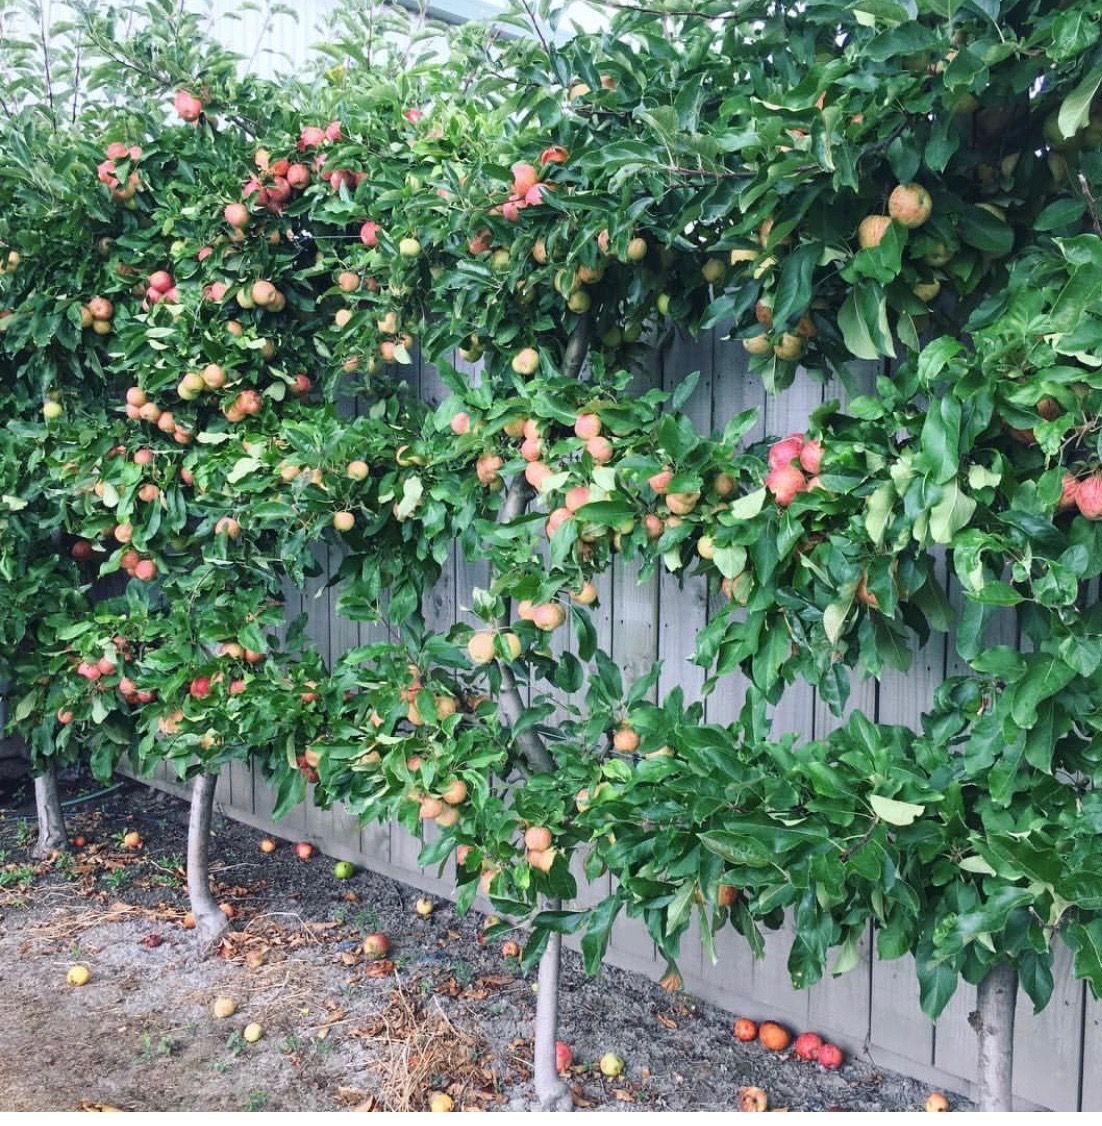
Fedges and Food-Producing Fences
Fedges, short for food-producing hedges, are wonderful living boundaries that combine productivity with functionality.
They are typically planted with a mix of berries, productive shrubs like feijoa, climbers, and even thorny barrier fruits such as Kei Apple. You can also create fedges as espaliered trees or living fence systems.
This is one of the smartest ways to turn plain fencelines and walls into fruitful growing spaces. Many fruit varieties respond beautifully to lateral pruning and espalier training, producing abundant harvests while providing natural insulation for buildings and softening their hard edges.
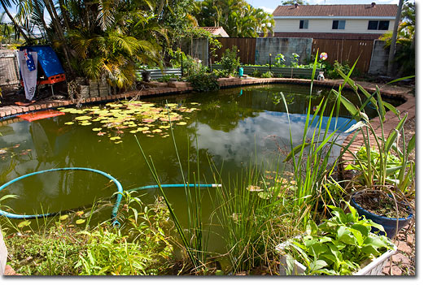
Aquaculture Pool
Aquaculture is approximately 20 times more productive per square metre than terrestrial food production systems.
One of the smartest ways to repurpose an existing swimming pool is to convert it into an aquaculture system or use it as a large rainwater storage tank with a deck built over it.
Aquaculture ponds are extremely productive, providing a wide range of yields for the kitchen and as forage for animals. They can still be used for occasional swimming or “dipping,” making them a highly efficient, multifunctional element in both urban and suburban settings.
Zone 1 Design Services
Let us help you design a productive and abundant Zone 1 system, whether you have a small urban garden, a suburban backyard, or just a compact courtyard. And the best part? This can all be done virtually, so your location is never a problem.
We will seamlessly integrate the classic Zone 1 elements into your space, turning it into a thriving, cultivated ecosystem that supports real self-reliance. You’ll enjoy a constant supply of fresh vegetables, herbs, berries, and small fruits, along with improved soil fertility and water independence.
Every design is uniquely tailored to your lifestyle and needs. We work closely with you to choose the best elements from a wide range of Zone-appropriate options.
Zone 1 Services Include:
- A complete Zone 1 design with a clear explanatory document
- Smooth integration between your home and garden for mutual support in water, energy, food, and quality of life
- Efficient worm-based composting systems
- Smart use of vertical space and container gardens
- Water harvesting, storage, and use strategies
- Well-planned annual vegetable and herb gardens
- Low-impact poultry integration
- Seasonal garden planning
- Small nursery design
- Effective mineral cycle and soil health management
- Greywater and compost toilet systems feeding the garden
- Optimisation of available solar energy
- Beautiful outdoor social spaces with pet-friendly design
Get in touch today. I’ll help you make the most of your property and turn its challenges into elegant solutions.
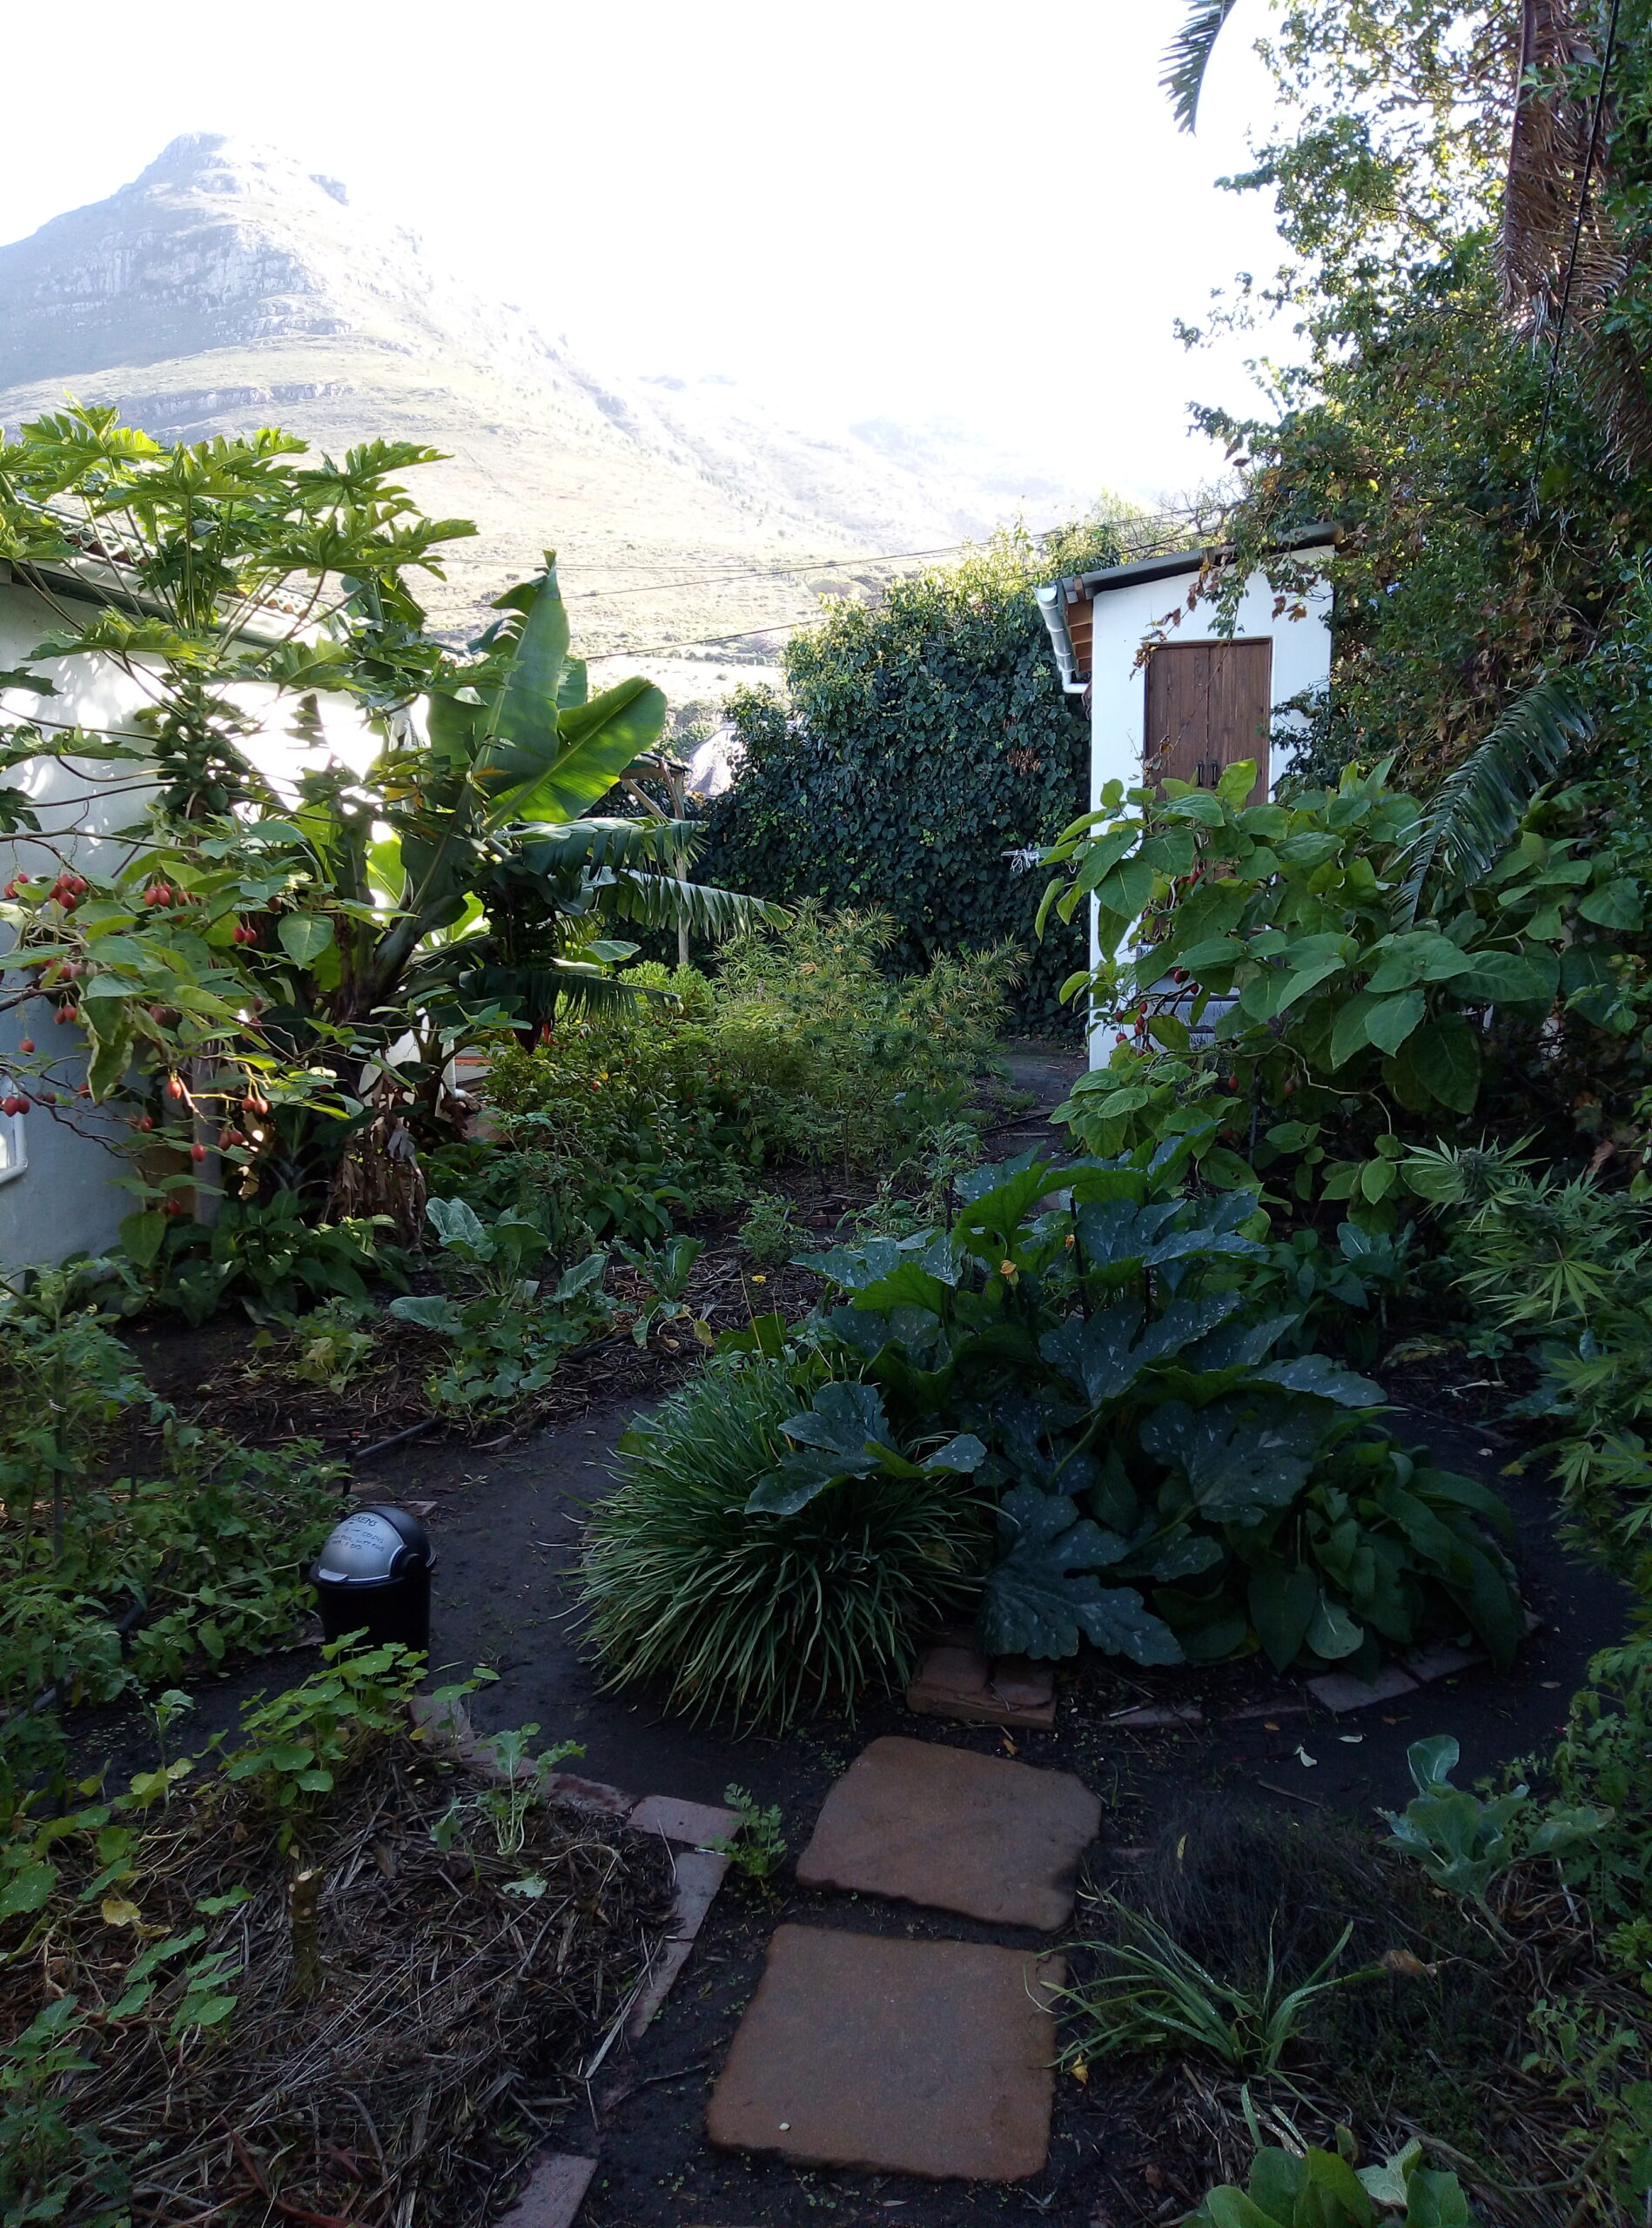
Zone 2 The Perennial & Bulk Food Zone
Moving outward from Zone 1 brings us to Zone 2, which focuses on bulk food production and perennial plants. Zone 2 is often called the “semi-frequent” zone. It bridges the gap between the intensively cared-for annual gardens in Zone 1 and the larger, agricultural systems further out in Zone 3.
In this zone, you generally visit and work every few days rather than every day. The emphasis shifts toward building long-term resilience and perennial productivity, with less constant daily attention required. For most people, Zone 2 marks the practical outer boundary of an urban or small suburban property. Zone 2 becomes practical on sites from around 1,500 square metres and onwards.
This is one of the most productive and important zones in the entire permaculture system. It forms the core of long-term food security by emphasising productive trees and diverse perennial systems. Approximately 70% of Zone 2 is dedicated to perennial species, mainly in the form of food forests, fruit and nut trees, berries, herbs, bulbs, and climbers. The remaining 30% is used for staple vegetable crops.
This balanced approach creates a highly resilient and abundant source of food that requires less daily maintenance than Zone 1 while delivering substantial yields over many years.

The Food Forest
The Food Forest is the primary perennial food production system in permaculture and one of its most iconic design elements.
A food forest is a densely stacked polyculture consisting of a highly diverse range of productive trees, shrubs, herbs, climbers, and ground covers. It is a cultivated forest ecosystem that mimics the structure and function of a natural forest, but is intentionally designed to produce abundant food and other essential resources for self-reliance.
Food forests are typically planted on contour, especially on sloped land, and are often integrated with water-harvesting earthworks such as swales.

Trellised Vines
In Zone 2, trellised vines such as grapes and other productive climbers play a valuable role in supporting food self-reliance, as well as fermentation and distilling projects.
The trellising systems in this zone are generally larger and more agricultural in style compared to those closer to the house. The emphasis here is on bulk production, allowing you to grow significant quantities of fruit for fresh use, preserving, winemaking, or other value-added products.
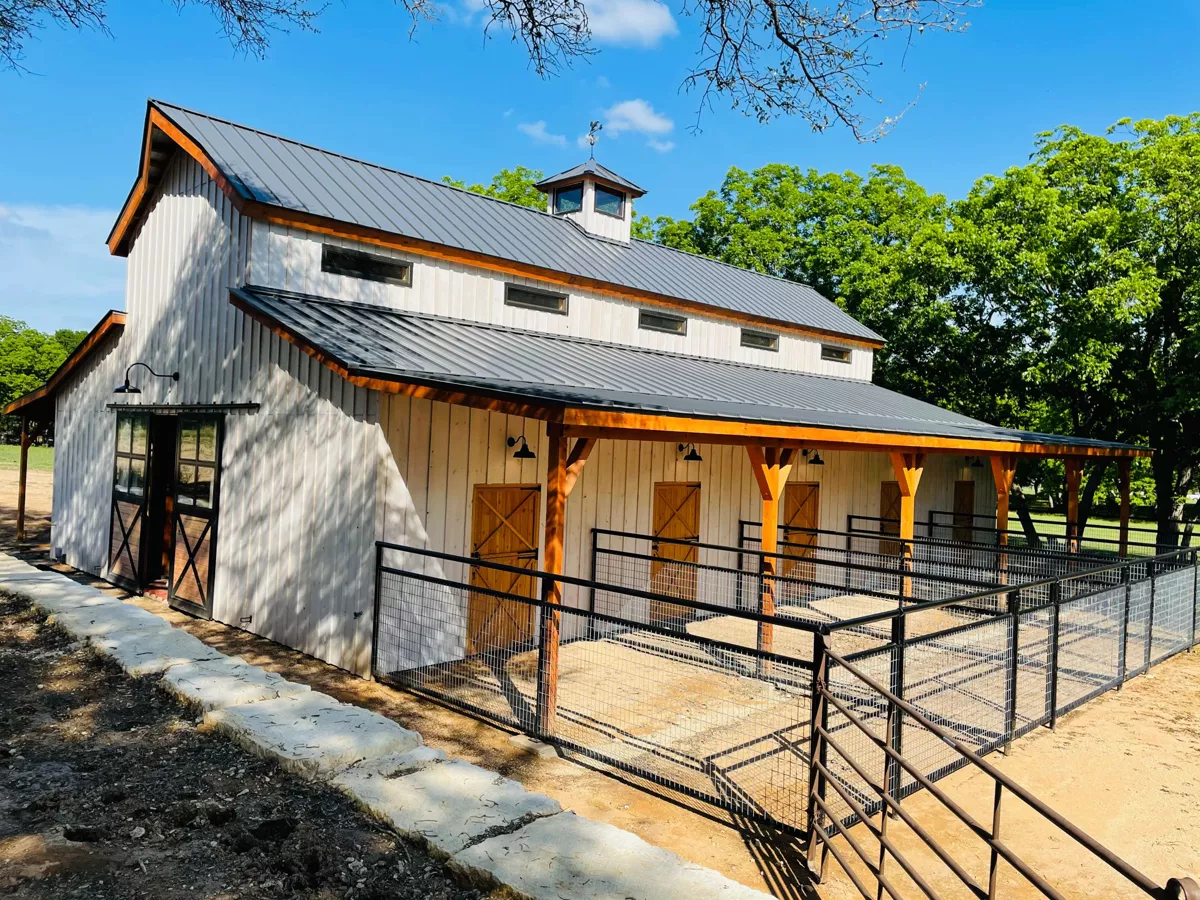
The Barn
For larger agricultural systems, Zone 2 is the most suitable location for barns and large-scale storage facilities.
These structures are engaged with on a daily basis but are typically too large and active for Zone 1. Their placement in Zone 2 provides good accessibility while connecting efficiently to the broader production areas in Zone 3 and outward.
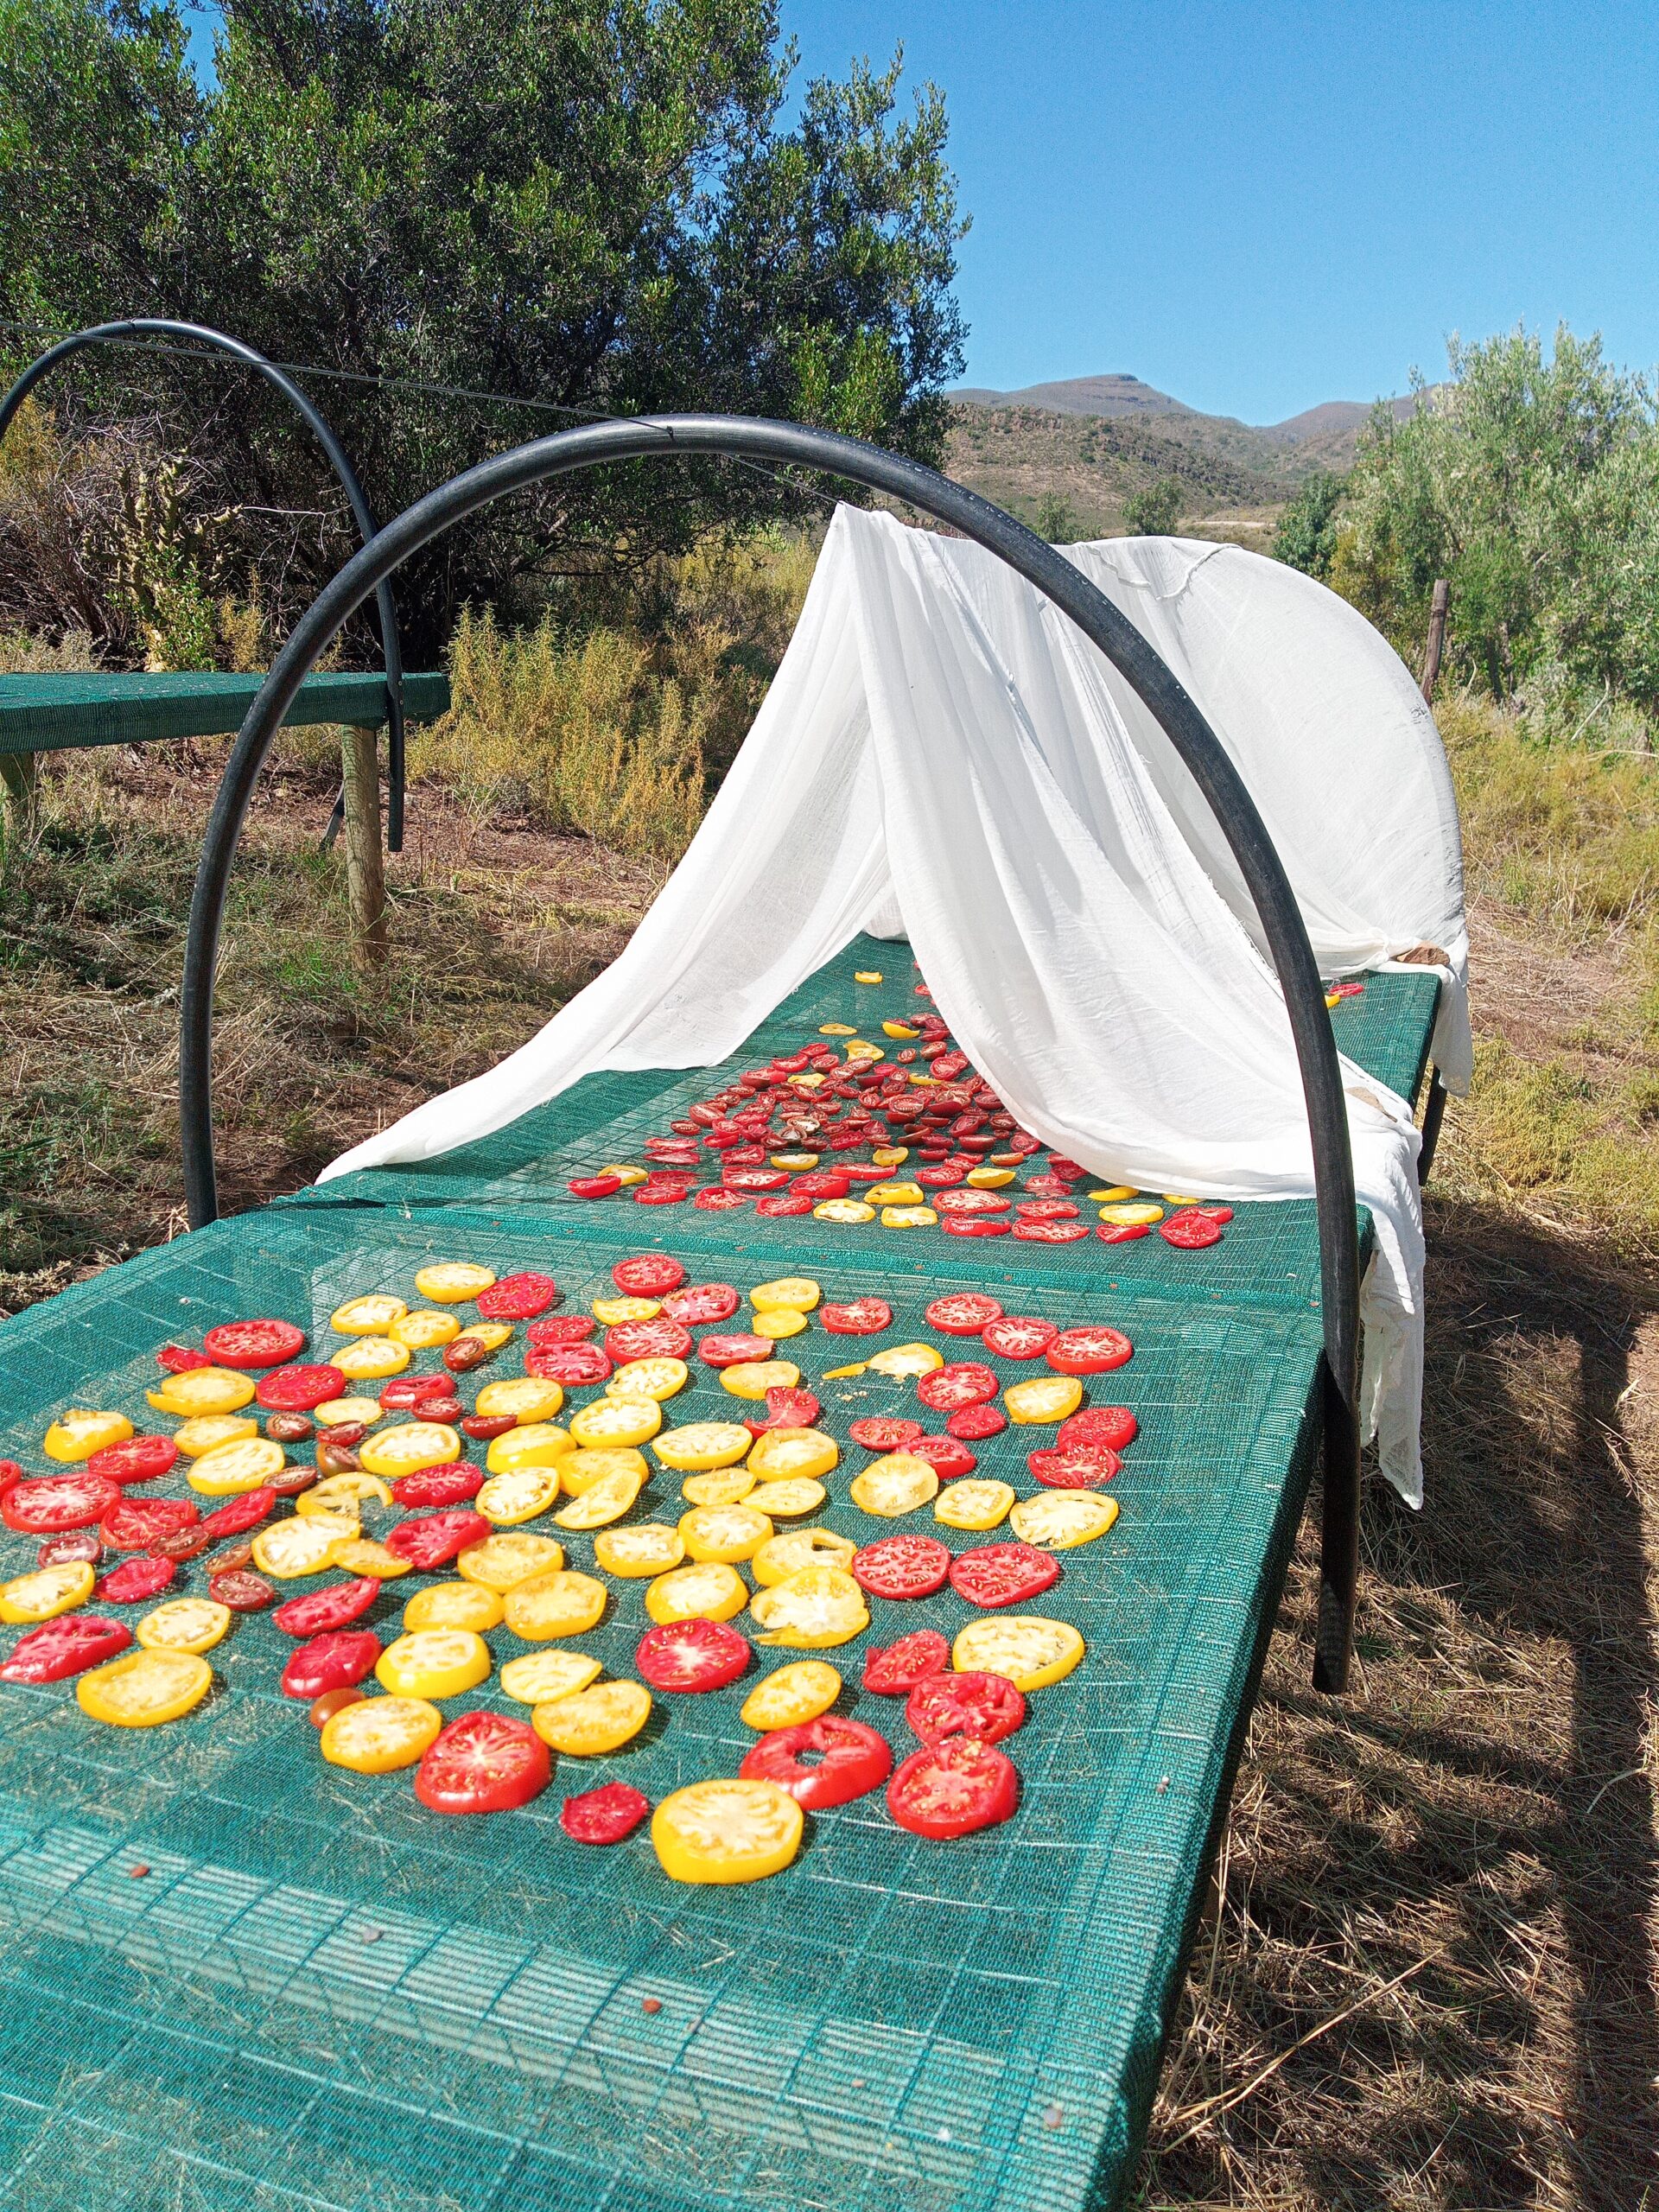
Drying and Larger-Scale Food Processing
This area is dedicated to the drying and processing of fruit and vegetables harvested from the staple gardens and food forests in Zone 2.
It includes rack systems and other drying infrastructure that require relatively large amounts of space. For this reason, drying and larger-scale food processing facilities are best located within or in close relation to Zone 2, allowing efficient movement of produce from the gardens and orchards to the processing area.

The Staple Food Garden
The Staple Food Garden is a larger-scale vegetable production area dedicated to growing staple crops for storage and processing.
This garden focuses on bulk annual cropping of space-intensive vegetables such as pumpkins and other cucurbits, maize, potatoes, sweet potatoes, and similar crops that provide substantial caloric yields.
These gardens are typically managed using animal tractors (such as chickens or pigs in mobile pens) rather than heavy composting, allowing the animals to naturally fertilise, till, and weed the beds while converting garden waste into manure.
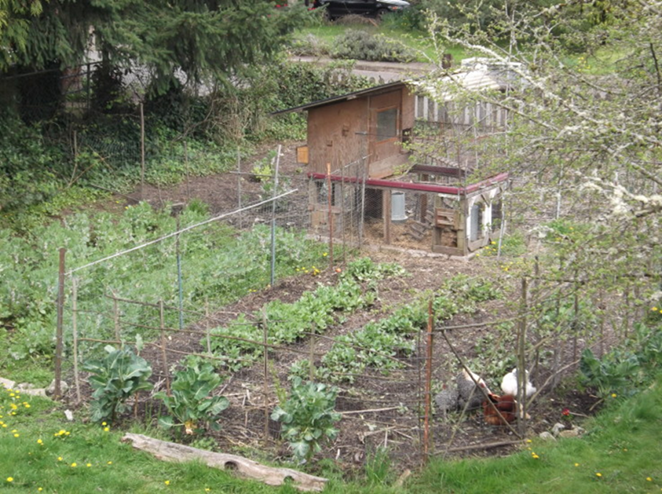
Chicken Rotation Yards
Chicken rotation yards are an efficient yard-based system that uses poultry to build and fertilise main crop garden soils.
The system typically consists of a central roost and laying house surrounded by a straw yard that receives garden waste. The chickens process this waste into rich manure. Around the straw yard are multiple fenced rotation yards. Poultry are moved through these yards in sequence, naturally fertilising and preparing the soil. Once the chickens move on, the highly fertile ground is immediately planted with vegetables.
This method creates a highly productive, closed-loop system that builds soil fertility while providing eggs and meat for the household.
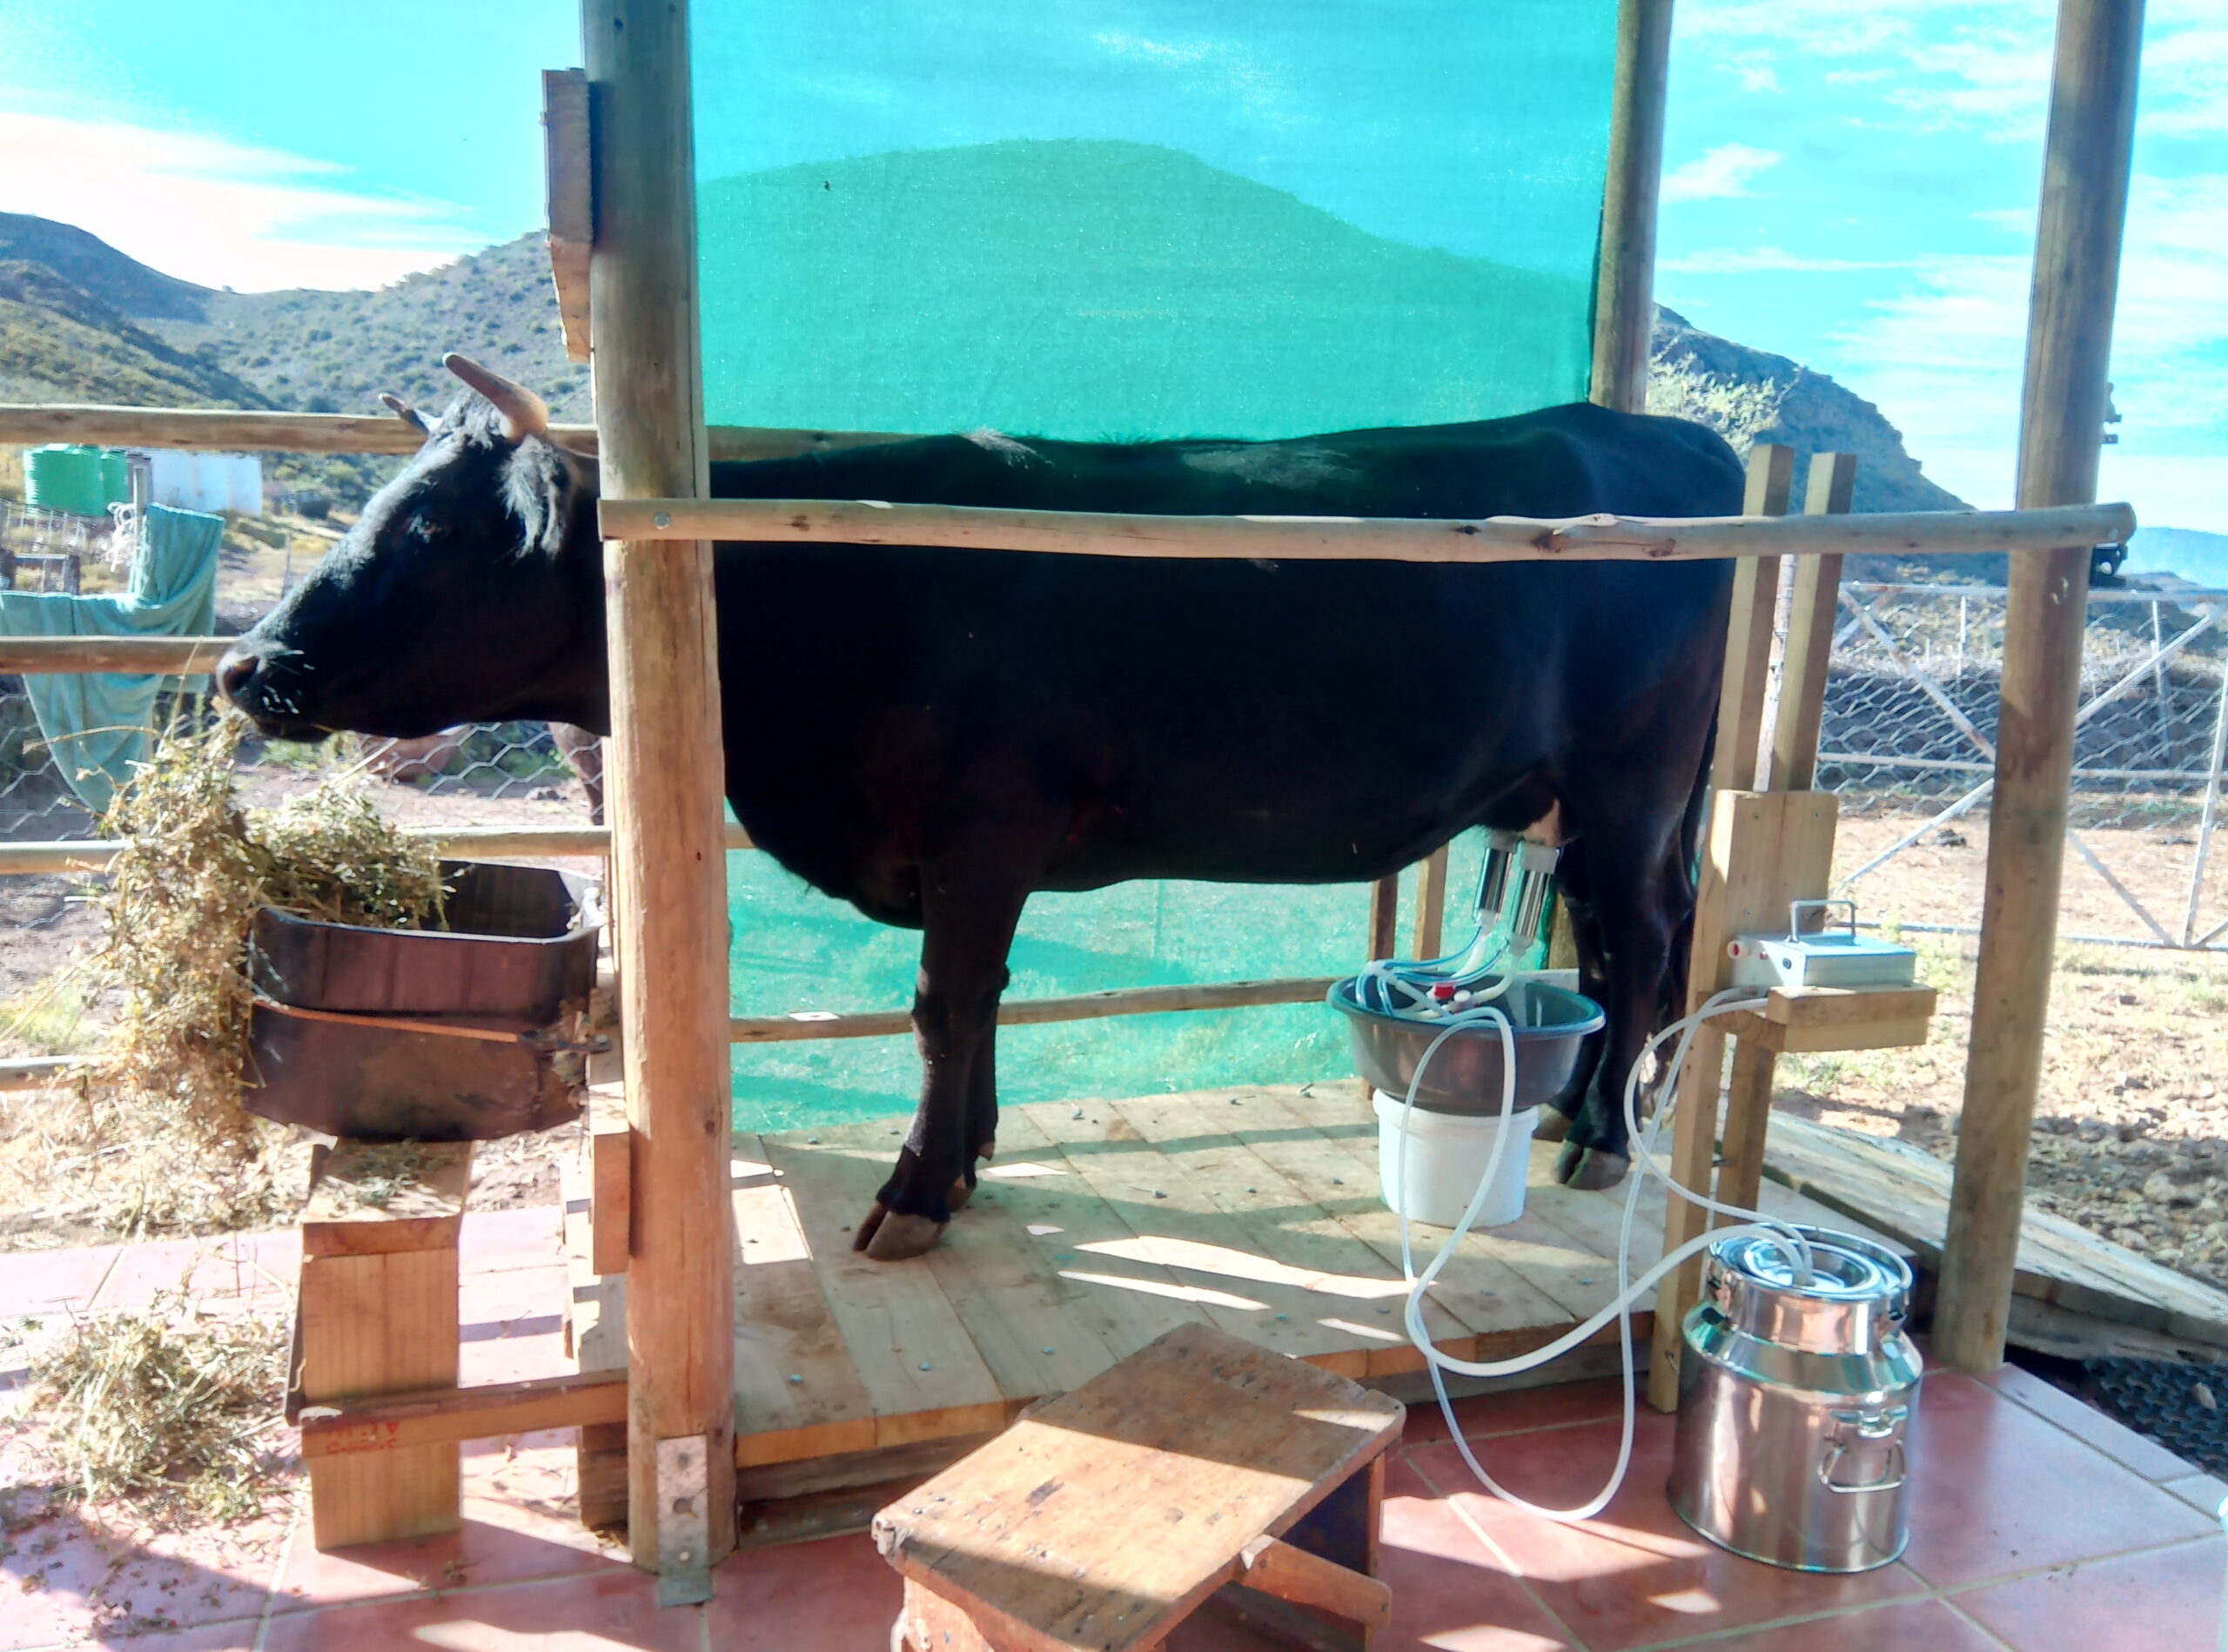
Animal Processing Infrastructure
Dairy facilities, slaughter areas, shelters, kraals, and nursing infrastructure are ideally placed on the edge of Zone 2, where it begins to transition into Zone 3.
This location allows larger livestock to range mainly in the more extensive outer zones, while still providing easy access for moving manure into the composting systems and bringing fresh animal products (milk, eggs, meat) into the kitchen area.

Bees
Zone 2 is the ideal location for beehives.
Positioned far enough from the house (Zone 0) to minimise any risk of disturbance or stings, this zone still allows easy access for management. The bees have excellent reach into Zones 1, 2 and 3 for foraging and pollination, supporting the productivity of kitchen gardens, fruit trees, and food forests while contributing to overall ecosystem health.
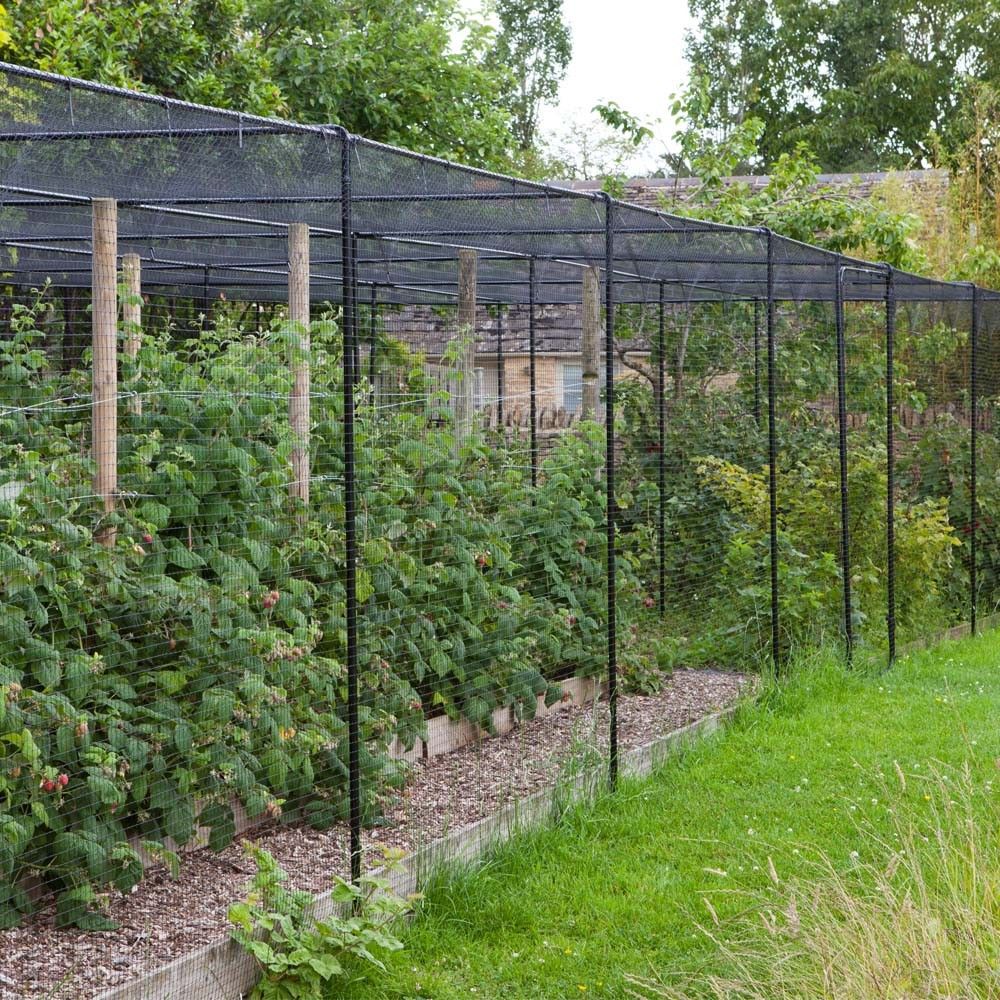
The Fruit & Berry Cage
Fruit and berry cages are shade cloth-covered tunnel structures designed to house berries, small fruit trees, and climbing fruits such as kiwis.
These protected growing areas shield plants from intense sun, hail, and bird damage, significantly improving fruit quality and yield while extending the harvesting season.
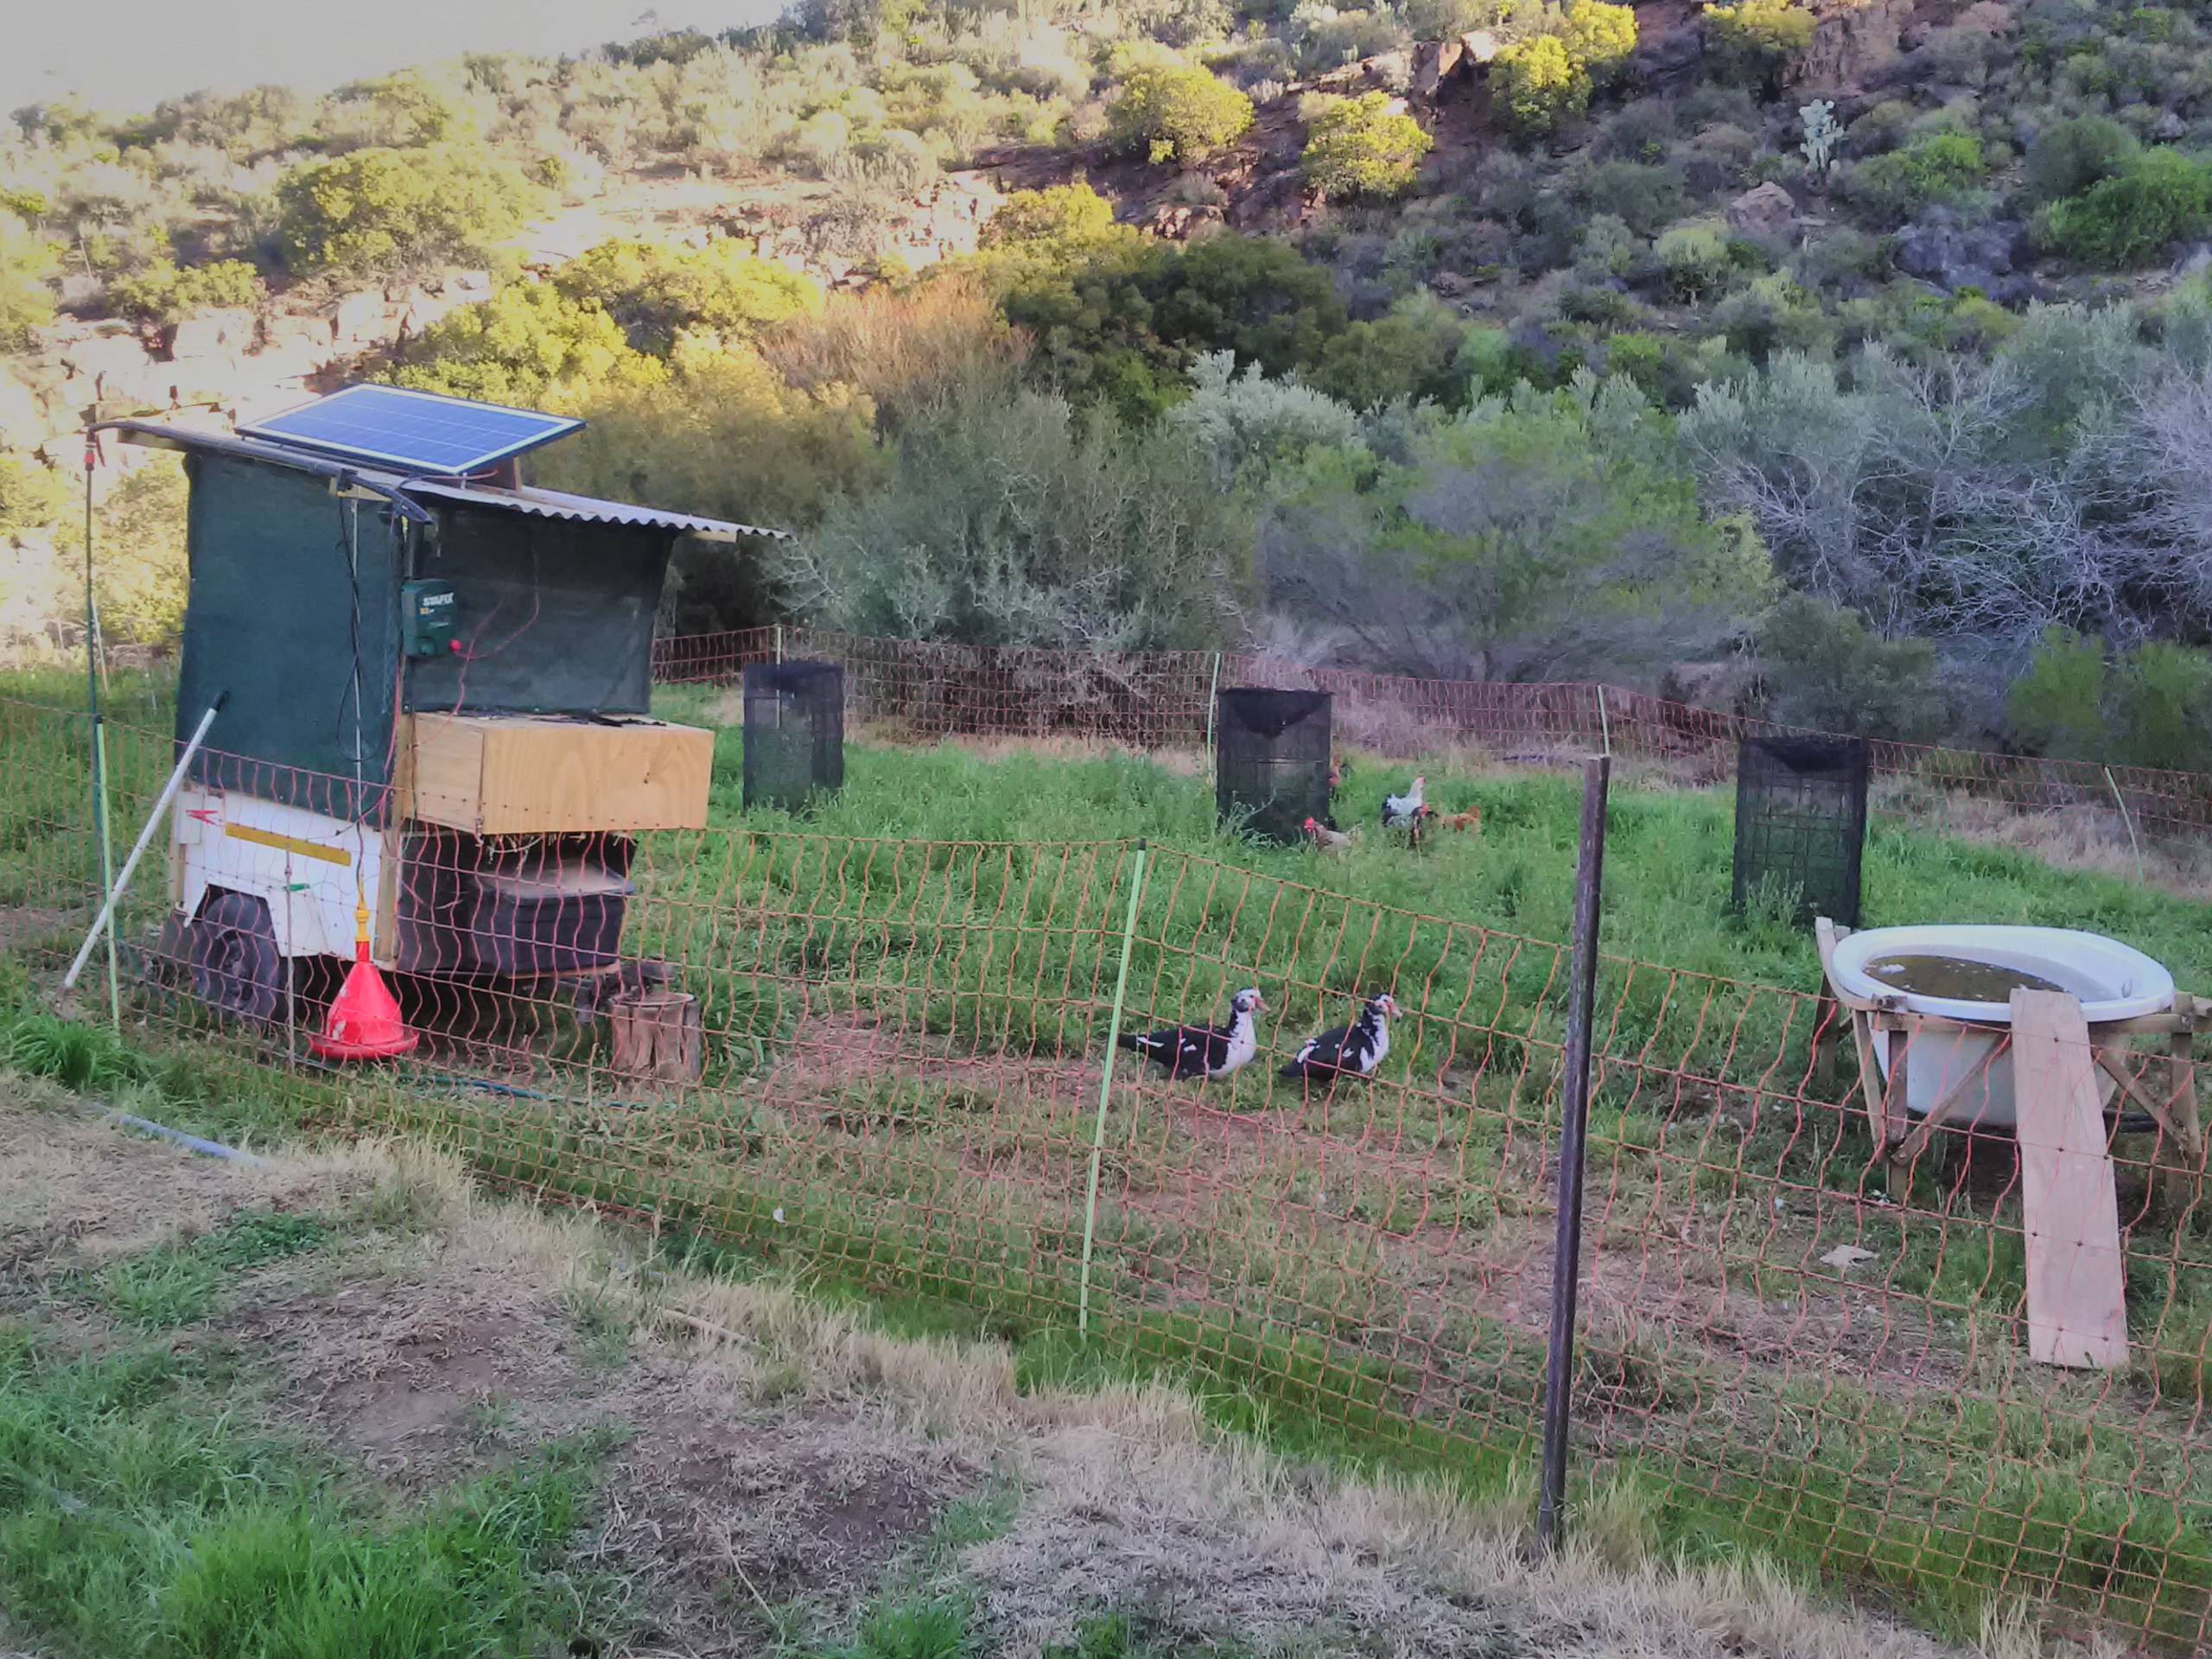
Mobile Electric Fenced Small Animal Tractors
Food forests and staple gardens in Zone 2 are ideally managed using mobile animal tractors.
At this scale, electric fence systems are most appropriate. They allow for efficient management of larger areas and support higher volumes of poultry. Mobile tractors enable chickens to fertilise, till, and control pests and weeds as they are rotated through the systems.
Pig systems are particularly effective for post-harvest cleanup. They can be used to clear garden residues and fallen fruit, turning waste into valuable manure while preparing the ground for the next planting cycle.
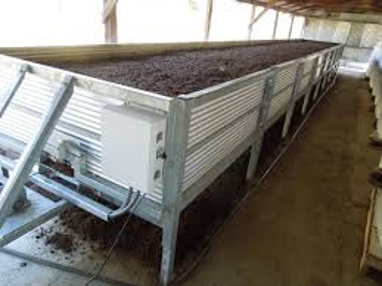
Large Scale Composting
Large-scale composting areas are best located next to the kraal and animal processing infrastructure.
Here, the significant volumes of manure generated from farm-scale animal activities are transformed into rich, fertile compost, mainly through the work of composting worms. This creates a continuous, valuable resource that feeds the gardens and food forests across the property.
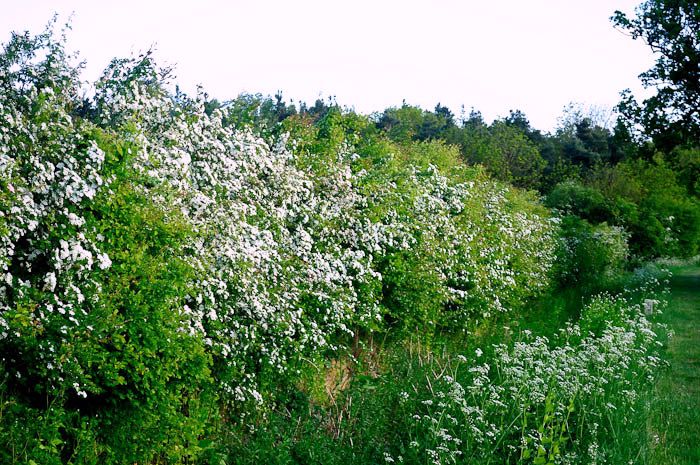
Windbreak Hedge
The outer edge of Zone 2 is the ideal location for a windbreak hedge.
This hedge can be multifunctional and food-producing, using species such as Kei Apple (which also serves as an effective thorny barrier) or flowering plants that support bee populations. For maximum effectiveness, the windbreak should be as tall as the food forest trees in Zone 2.It serves as an excellent transition between Zone 2 and Zone 3, and also works beautifully as a boundary system for smaller properties.
Zone 2 Design Services
We can help you integrate a highly productive Zone 2 system into your property, delivering a steady supply of climate-appropriate fruits, nuts, berries, herbs, small animals, staple foods, and other suitable elements, all tailored to your unique situation and goals.
Our Zone 2 design services include:
- Designing fruit, nut, and berry systems within seamless, cultivated ecosystems that make efficient use of space and sunlight.
- Integrating small animals such as poultry, bees, and worm farms into compact spaces to boost ecosystem services and self-reliance, even on urban properties.
- Creating climate-specific food forest designs.
- Developing living fences, food-producing hedges, and windbreaks using native and appropriate productive species.
- For farms: Designing larger-scale food forests for high production and strategically placing and scaling main crop vegetable gardens.

Zone 3 Agriculture/Agroecology
Moving outward from Zone 2 brings us to Zone 3. Zone 3 is the first of the outer zones dedicated to broad scale land-use systems.
This is the main agricultural or agroecological zone, where the focus shifts from pure self-reliance to generating surplus for the market. It is the realm of commercial-scale farming within a permaculture framework.
The predominant activities in Zone 3 include field cropping, agroforestry, and rotational grazing. All systems are established on contour, typically featuring belts of trees planted on swales with open alleys between them for cropping and grazing. This pattern creates a highly productive, water-harvesting landscape that balances surplus production with ecological health.
Management & Production Approach
In wetter climates, larger-scale grain cropping and annual production may be viable. However, the predominant focus in Zone 3 remains on trees and perennials grown in simple polycultures.
Species selection is highly climate-specific, with a strong emphasis on animal integration. This zone represents a shift away from the complex polycultures typical of food forests, where plants perform most ecosystem functions, toward simpler systems in which animals carry out many of those roles.
We apply the STUN principle (Strategic, Total and Utter Neglect) as our primary cultivation strategy. This involves letting nature take its course: multiplying the species that thrive with minimal inputs and removing those that do not perform well.
This low-intensity approach is essential for profitability at this scale, as the size of Zone 3 systems does not allow for the high level of daily cultivation and management found in the inner zones.
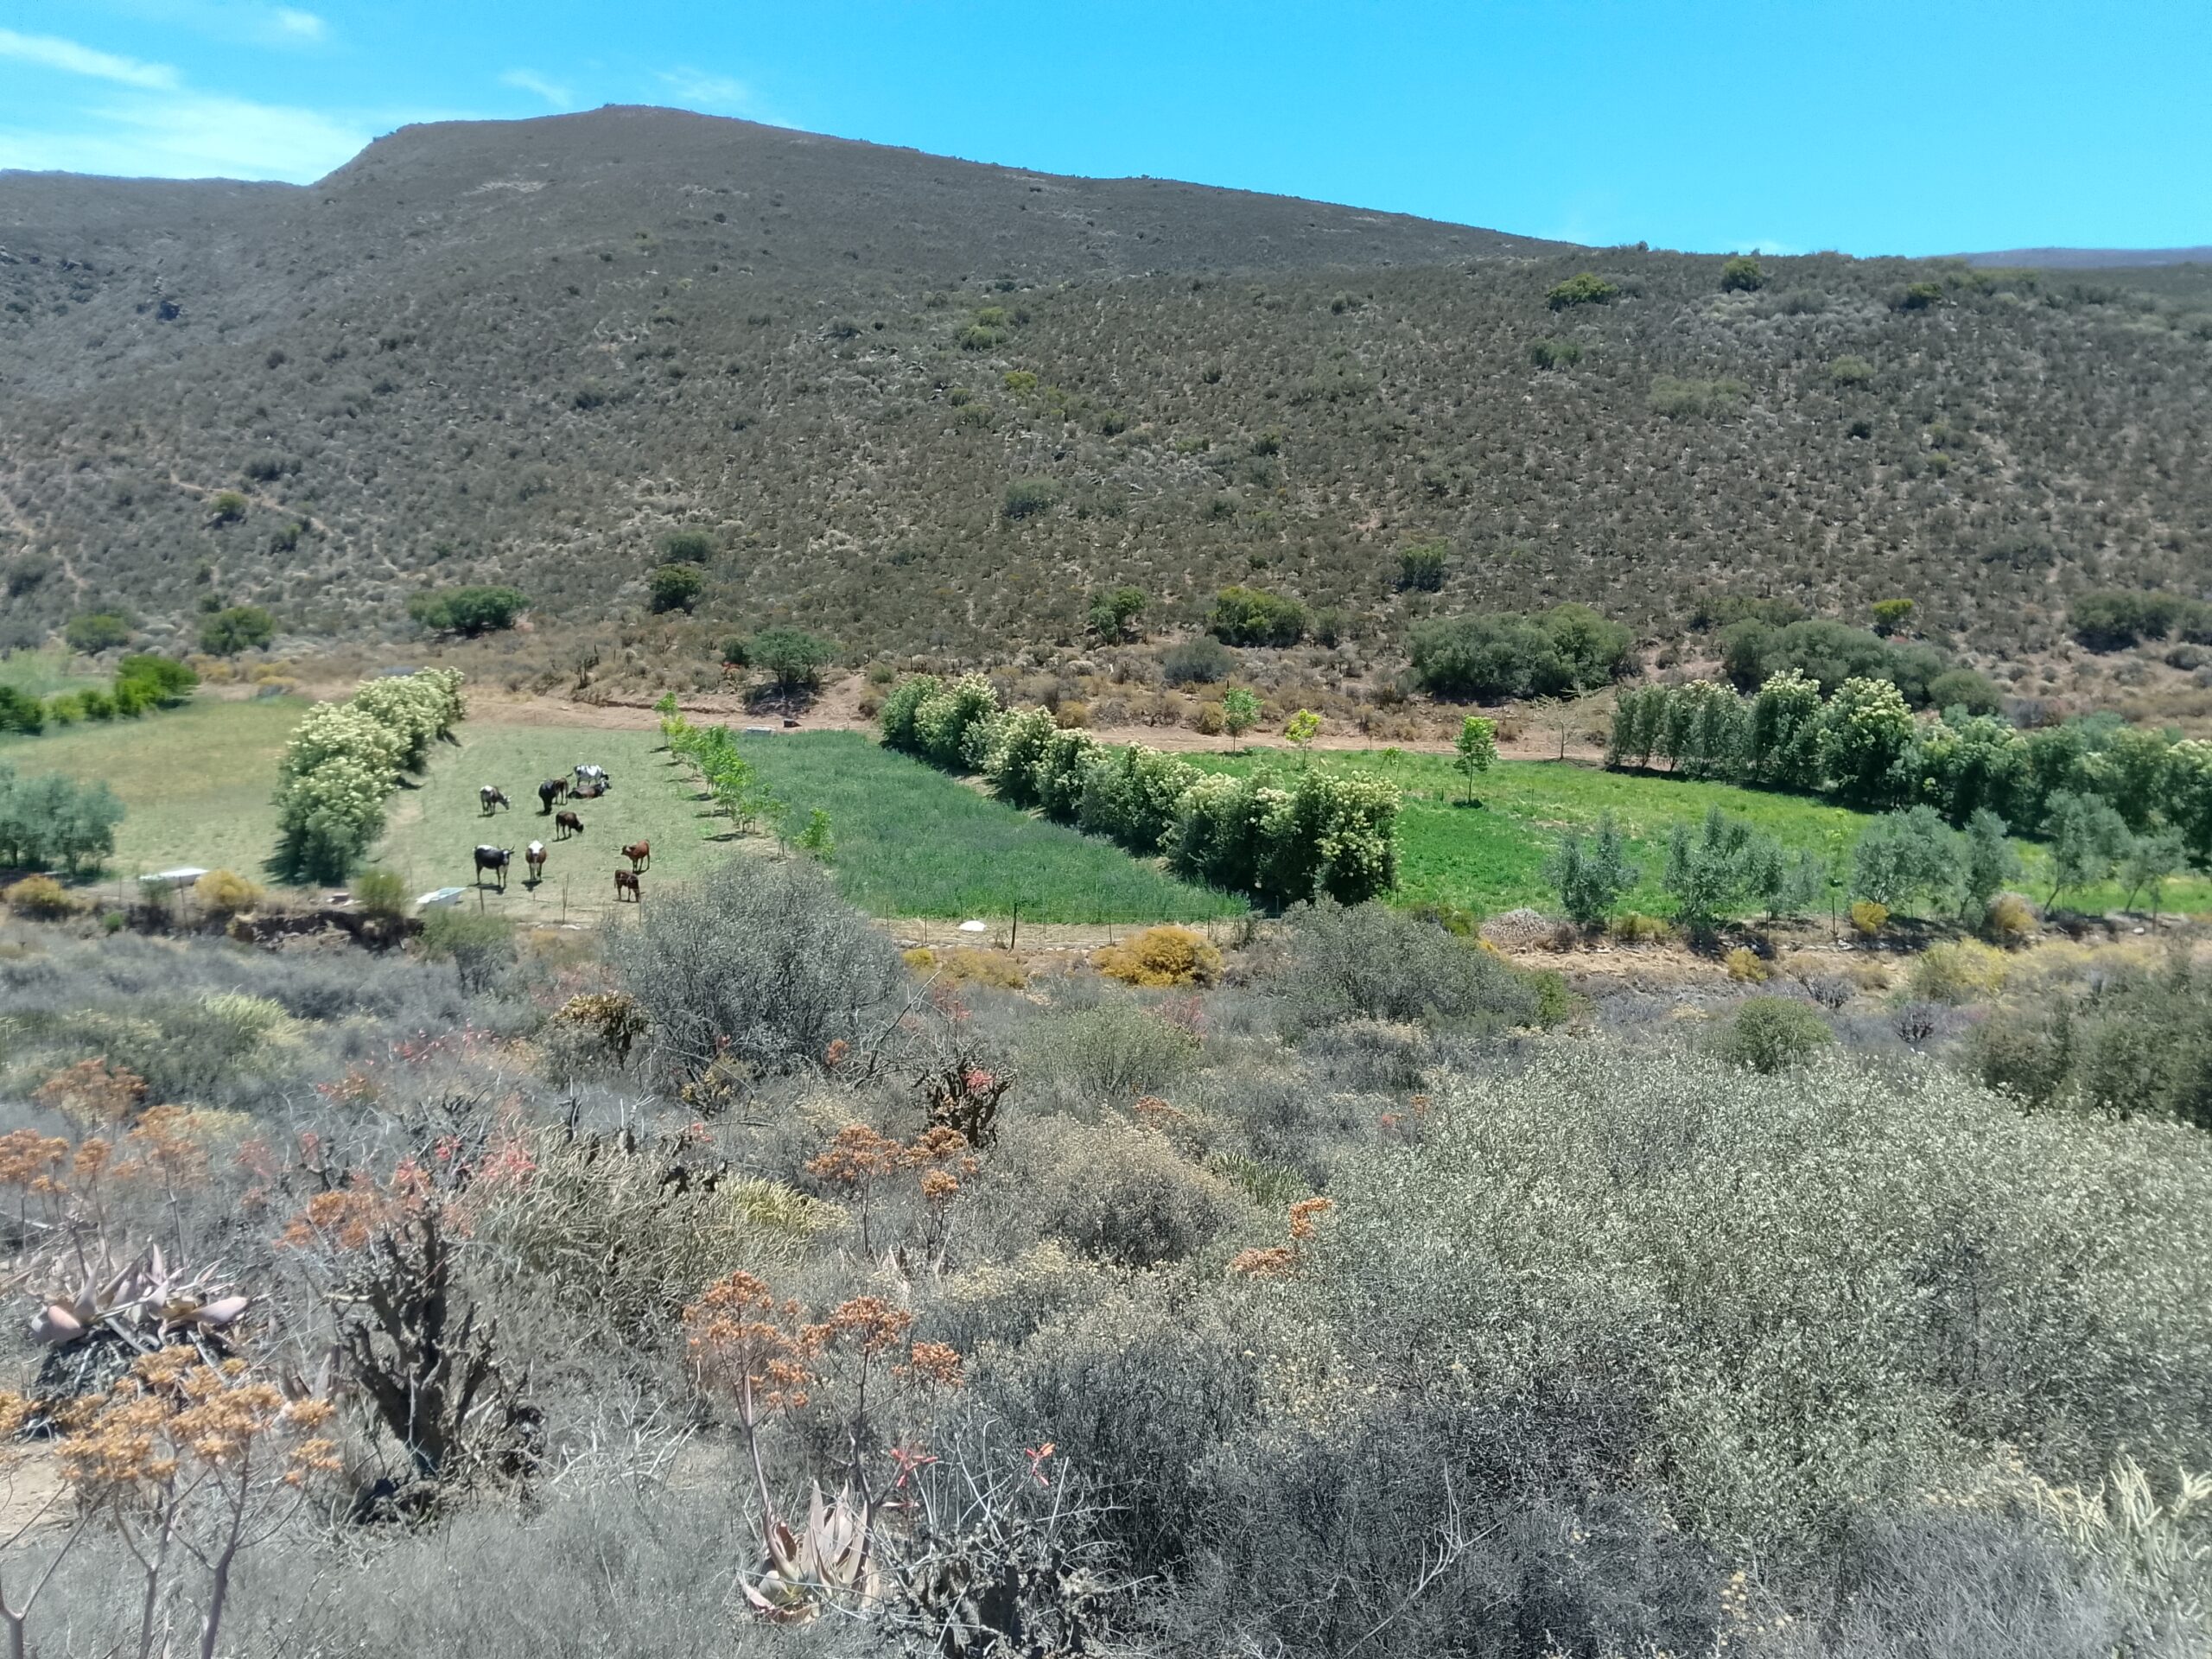
Agroforestry
Agroforestry is the main large-scale production strategy in permaculture. It involves growing diverse tree polycultures in contour-aligned belts, with open alleys between them used for cropping or pasture. The tree belts are usually established on swales or keylines to capture and store water effectively.
Grazing and Forage Animals
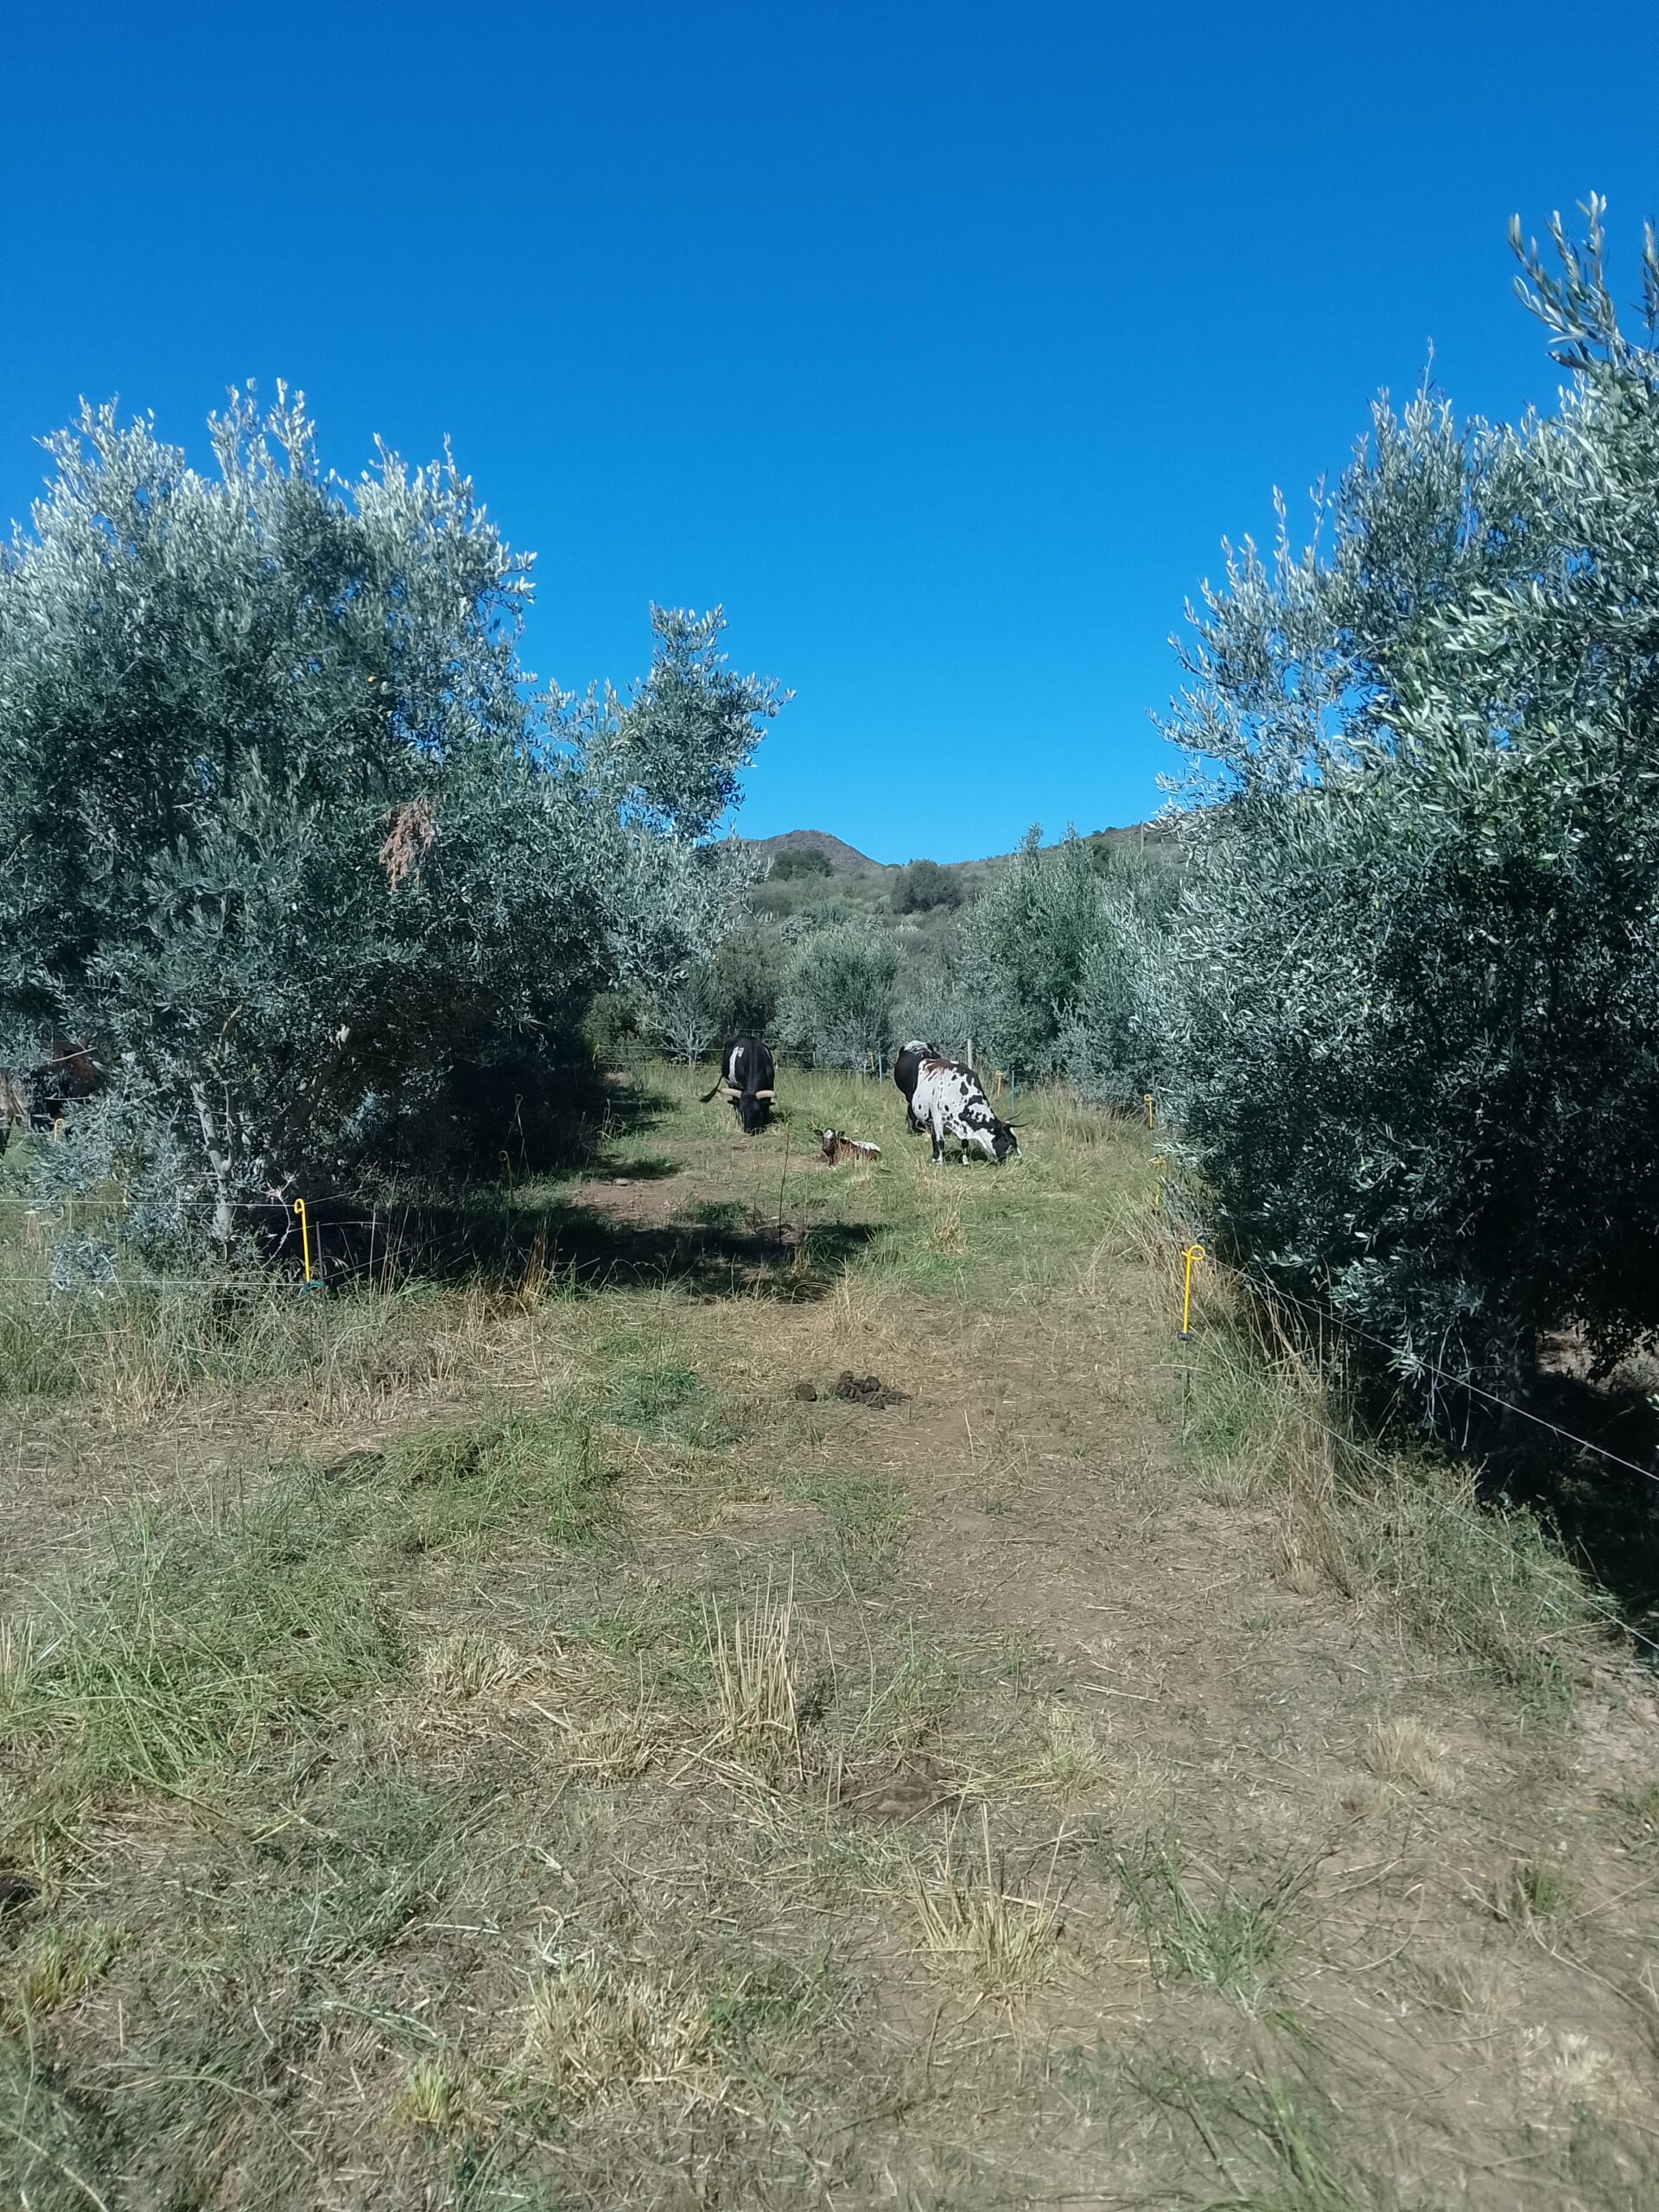
Grazing and forage animals are rotated through the alleys between tree belts using mobile electric fenced systems (animal tractors).
As they move, the animals build soil fertility through natural manuring, convert pasture into high-quality animal products (meat, milk, eggs), control pests and weeds, prune lower tree branches, and clean up fallen fruit. This integrated approach creates a highly efficient, closed-loop system that enhances overall productivity and soil health.
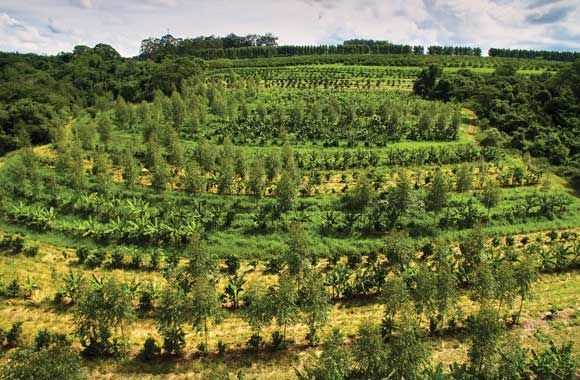
Contour based Tree Belts
These tree systems include hardy fruit and nut trees, valuable coppicing and pollarding timber species, bio-oil trees, fodder trees, and grapes grown on trellises or in bush form. All are chosen for their resilience and ability to produce with minimal ongoing inputs.

Irrigation Dams
Zone 3 is the typical location for larger irrigation dams on farms where water availability and soil conditions justify their construction. These dams are generally form a boundary between Zone 3 and Zone 4.
These dams are designed to supply sufficient water for the production systems in Zone 3 and beyond. They play a vital role in supporting high-yield cropping, agroforestry, and pasture systems during dry periods, significantly improving overall farm resilience and productivity.
Alleys between Tree Belts
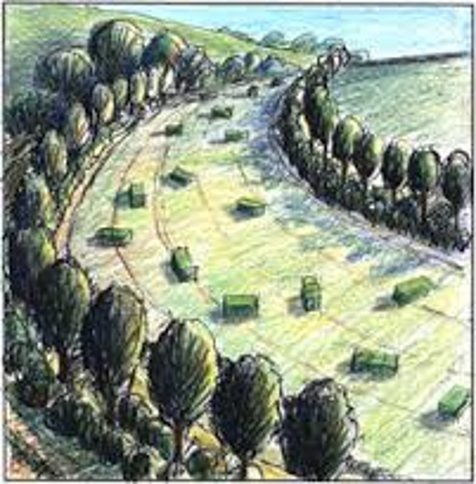
The alleys between the tree rows are planted with cultivated pastures, fibre crops (such as hemp), oil crops, grains, and in wetter climates, other cash cropping annuals.
In most cases, the alleys are sown with perennial pastures, which form the foundation for a mob grazing livestock system and straw baling.
Aquaculture
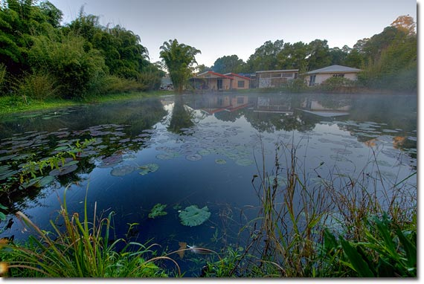
Where surface water is abundant, aquaculture becomes a valuable and highly productive part of Zone 3.
This involves raising fish and aquatic plants in ponds or converted dams. These systems are remarkably efficient, often 20 times more productive per square meter than conventional gardening or cropping.
In Zone 3 the ponds are built at a larger dam scale (typically over 100 m²), which allows natural self-aeration. They yield plenty of fish protein and edible water plants along the edges. The pond margins also make excellent sites for food forests, linking water and land production seamlessly.
When managed thoughtfully, these aquaculture systems provide both food and water storage while enhancing the overall biodiversity and resilience of the farm.
Zone 3 Design Services
We can help you create a solid mainframe design for Zone 3 that forms the backbone of your larger-scale production areas. This includes a comprehensive contour-based water-harvesting earthworks system designed specifically for your land’s shape and climate. From there, we plan practical access routes, fencing, and the placement of productive agricultural systems.
Our Zone 3 services include:
- Strategic location and design of sand dams, swales, and small dams
- Well-placed farm roads and livestock laneways following contours and ridges
- Climate-appropriate agroforestry layouts that align with your production goals and water availability, including livestock integration
- Complete water resource planning — from irrigation systems scaled to your crops, to boreholes, storage, and gravity-fed solutions where possible
- Design of water source points including weirs, boreholes, and small dams

Zone 4 The semi-wild agricultural/agroecological Zone
This is a semi-wild Zone, with very low management and intensity and is mainly focused on Grazing and Timber. Systems here are very hardy systems and are rain fed. Here contour based earthworks form the only system of hydration and the area under this Zone is generally much larger than Zone 3.
Here we find only perennial production plants that are very hardy and need virtually no attention. Management is on the whole based on rotational movement of grazing and browsing animals through the systems. Trees and semi-wild pasture form the basis of this zone.
Timber and Firewood
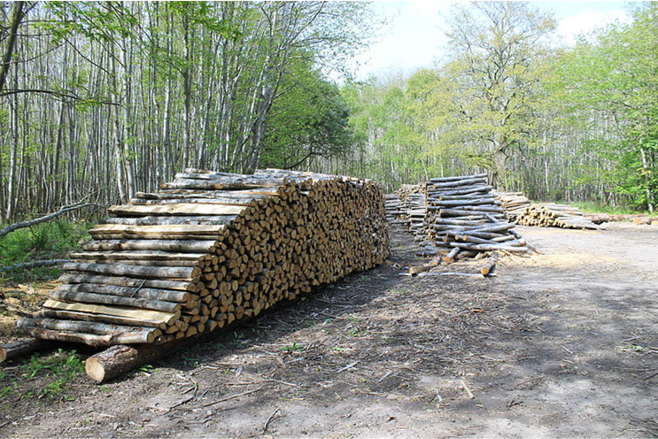
Zone 4 is the ideal area for developing farm forestry and timber production. Timber trees are hardy, long-term crops that are typically harvested only once after many years of growth.
Timber strips are established on swales, with herb layers or unirrigated grassland pastures in the alleys between them. This zone includes both long-term, high-value timber species and shorter-rotation coppicing and pollarding trees for structural uses and firewood.
In more humid climates, bamboo and various hardwoods are also well-suited to this zone.
In the right context, generally in dryer climates, medicinal plants are integrated into the system, with trees and larger shrubs in the tree belts, and bulbs, smaller shrubs, and runners in the alleys.
Grazing & Silvopasture
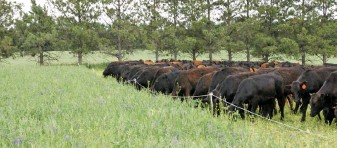
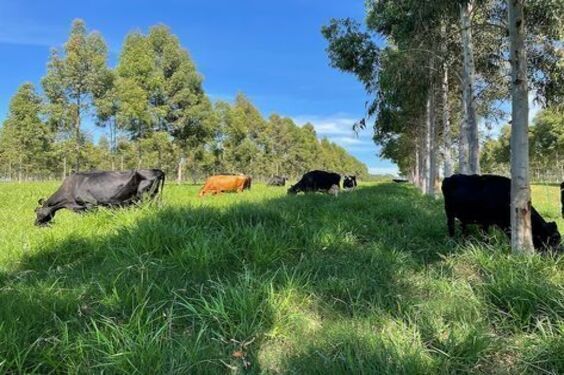
Silvopasture, the integration of grazing with timber production, is a simple and highly effective way to diversify yields and maintain good management in Zone 4.
Grazing is conducted using mob grazing techniques with mobile electric fencing. This approach regenerates ecosystem processes through natural fertilisation, weed and pest control, and soil stimulation, while simultaneously producing high-quality animal products.
Riverine Forestry and Sand Dams
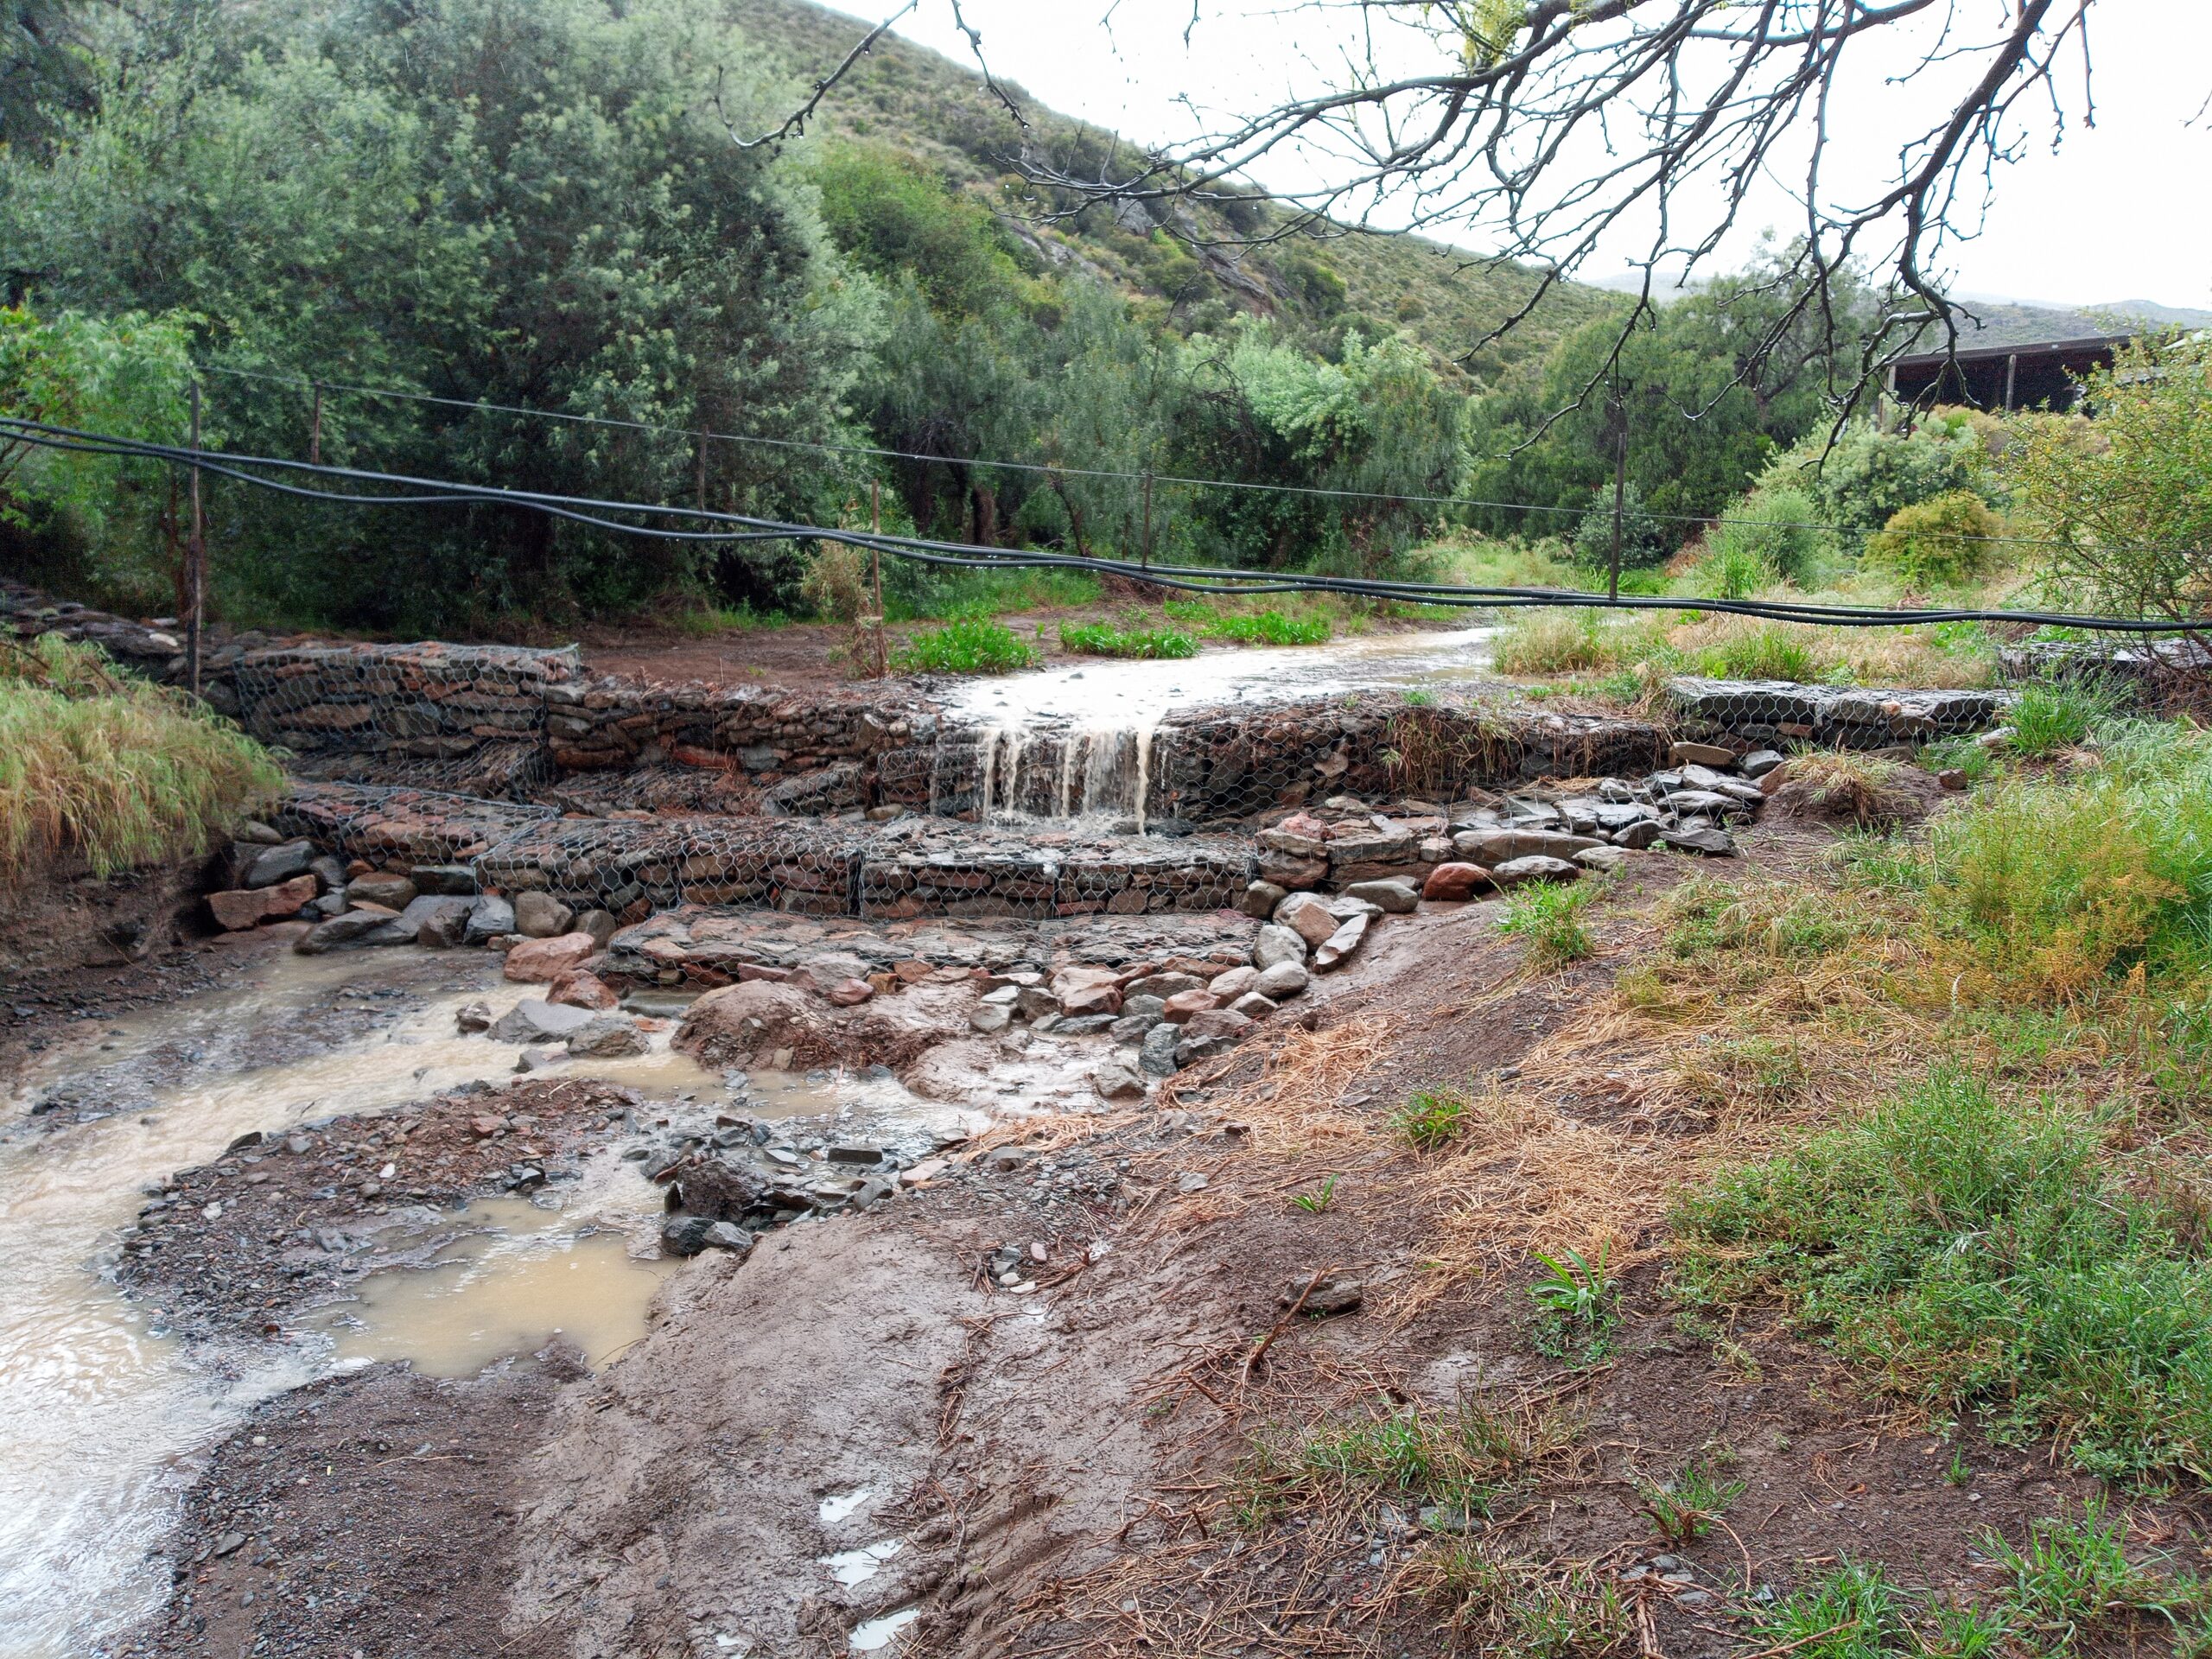
In dry climates, riverine forestry combined with sand dams is a highly effective strategy.
Sand dams are low gabion or concrete walls built across non-perennial (seasonal) stream courses. After a few flood events, they fill with gravel and sand, retaining approximately 30% water content that does not evaporate. This stored water slowly rehydrates the watercourse and recharges groundwater in the valley.
The elevated groundwater table created by the dams supports the establishment of riverine forestry along the stream edges, providing long-term, clean water storage and enabling productive tree systems in arid environments.
Zone 4 Design Services
Drawing on years of hands-on experience from our own farm and those of clients, We can help you create a solid mainframe design for Zone 4.
Zone 4 functions as a simplified, lower-intensity version of Zone 3. The same core principles apply, contour-based earthworks, access routes, and fencing systems form the backbone of the layout. However, the focus here is on hardy, resilient perennial plant species that thrive with minimal irrigation and management.
Our Zone 4 Design Services Include:
- Strategic location and design of sand dams, swales, and small dams
- Well-placed farm roads and livestock laneways following contours and ridges
- Climate-appropriate timber-based silvopasture layouts aligned with your production goals and water availability
- Ecosystem health assessments and restoration plans
- Design of grazing systems between timber belts
- Hardy, indigenous tree-based windbreak systems along the perimeters of production areas
Zone 5 The Wilderness Zone
Zone 5 is the wilderness area of our properties, the wild heart where nature is given the greatest freedom. Permaculture teaches us an inspiring truth: we can produce more than enough to meet all human needs using just 10 to 20% of the land currently under agriculture. This gives us the opportunity to return vast areas back to the wild.
In Zone 5, our role shifts from managers to stewards and visitors. Here we focus on restoring indigenous ecosystems through gentle, well-timed interventions, such as rotational grazing and simple restoration structures like gabions and swales. The truth is that the long-term success of any permaculture system depends on the health of the larger ecosystem around it. By designing for higher productivity on a smaller footprint, we can reduce our impact and assist nature to reclaim and regenerate more of the land.
Soil Restoration
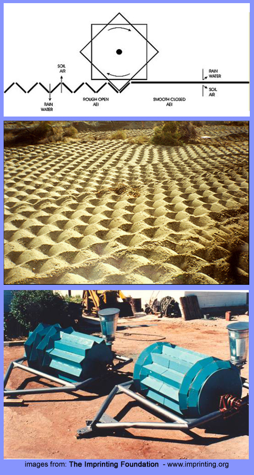
In Zone 5 and other degraded parts of the land, we focus on active restoration. This is primarily achieved through properly timed mob grazing, combined with thoughtful infrastructure such as swales, earth imprinting, and strategic recharge plantings. These methods repair eroded areas, rebuild soil health, and restore the natural mineral and water cycles, gradually bringing the land back to life and increasing its regenerative capacity.
Alien Vegetation Removal
The removal of alien (invasive) vegetation is a major challenge in many parts of South Africa and around the world.
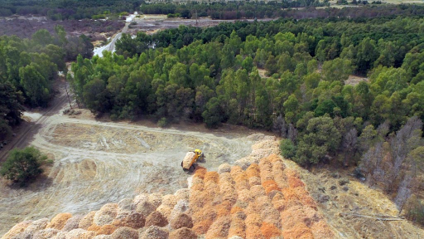
This process can be turned into a profitable operation by utilising the cleared biomass. Wood can be processed into feedstock for syngas burners to generate energy for micro-grids or fed into the main electricity grid. Stumps and branches can be chipped and used as substrate for mushroom cultivation, creating an additional revenue stream while contributing to soil regeneration.
Benefits of Restoration
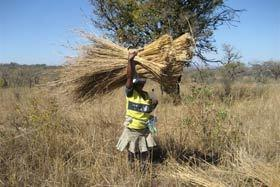
Restored Zone 5 areas are tourist attractions, educational areas, and places of spiritual restoration.
Regenerated landscapes feed healthy and abundant natural resources into society such as consistent river flows, high water tables, stable slopes, clean air and stable climate.
Wild areas (Zone 5) can provide vast amounts of resources with minimal or no cost. Through regenerative hunting and fishing, they supply significant quantities of wild food. They also yield valuable resources such as timber, medicinal plants, seed stock, and genetic material for production systems. Additionally, they offer natural grazing for livestock and raw materials for infrastructure and construction.
Zone 5 Design Services
In Zone 5, our focus is on land restoration and helping you decide which parts of your property to leave as true wilderness. Many landowners don’t realise how the poor state of their mineral and water cycles, largely determined by the surrounding natural ecosystems, affects the entire property.
We commonly see large areas of bare soil, heavy infestations of alien vegetation, and poor control of overland floodwater. When we successfully regenerate these areas, the natural ecosystem begins to recover and thrive, which in turn supports and strengthens your production systems.
Zone 5 Design Services Include:
- Ecosystem processes assessments to clearly understand the current health of your land
- Restoration designs to repair eroded and degraded areas
- Strategic design and placement of sand dams, swales, and small dams
- Gabion structures for erosion control and recovery
- Recharge planting plans
- Restoration of riverine ecosystems using indigenous plants to re-establish healthy forests and thickets
- River training to prevent downward and sideways erosion and to keep streams and drainage lines on their natural paths
